
RickAndMorty.mcp
Model Context Protocol
MCP (Model Context Protocol) is an open standard for connecting AI models to external systems like: databases, APIs, code repositories, file systems, internal documentation stores, and enterprise productivity tools. MCP is like a USB-C port for AI applications: just as USB-C is a standard for connecting devices, MCP is a standard for connecting AI models to external systems.
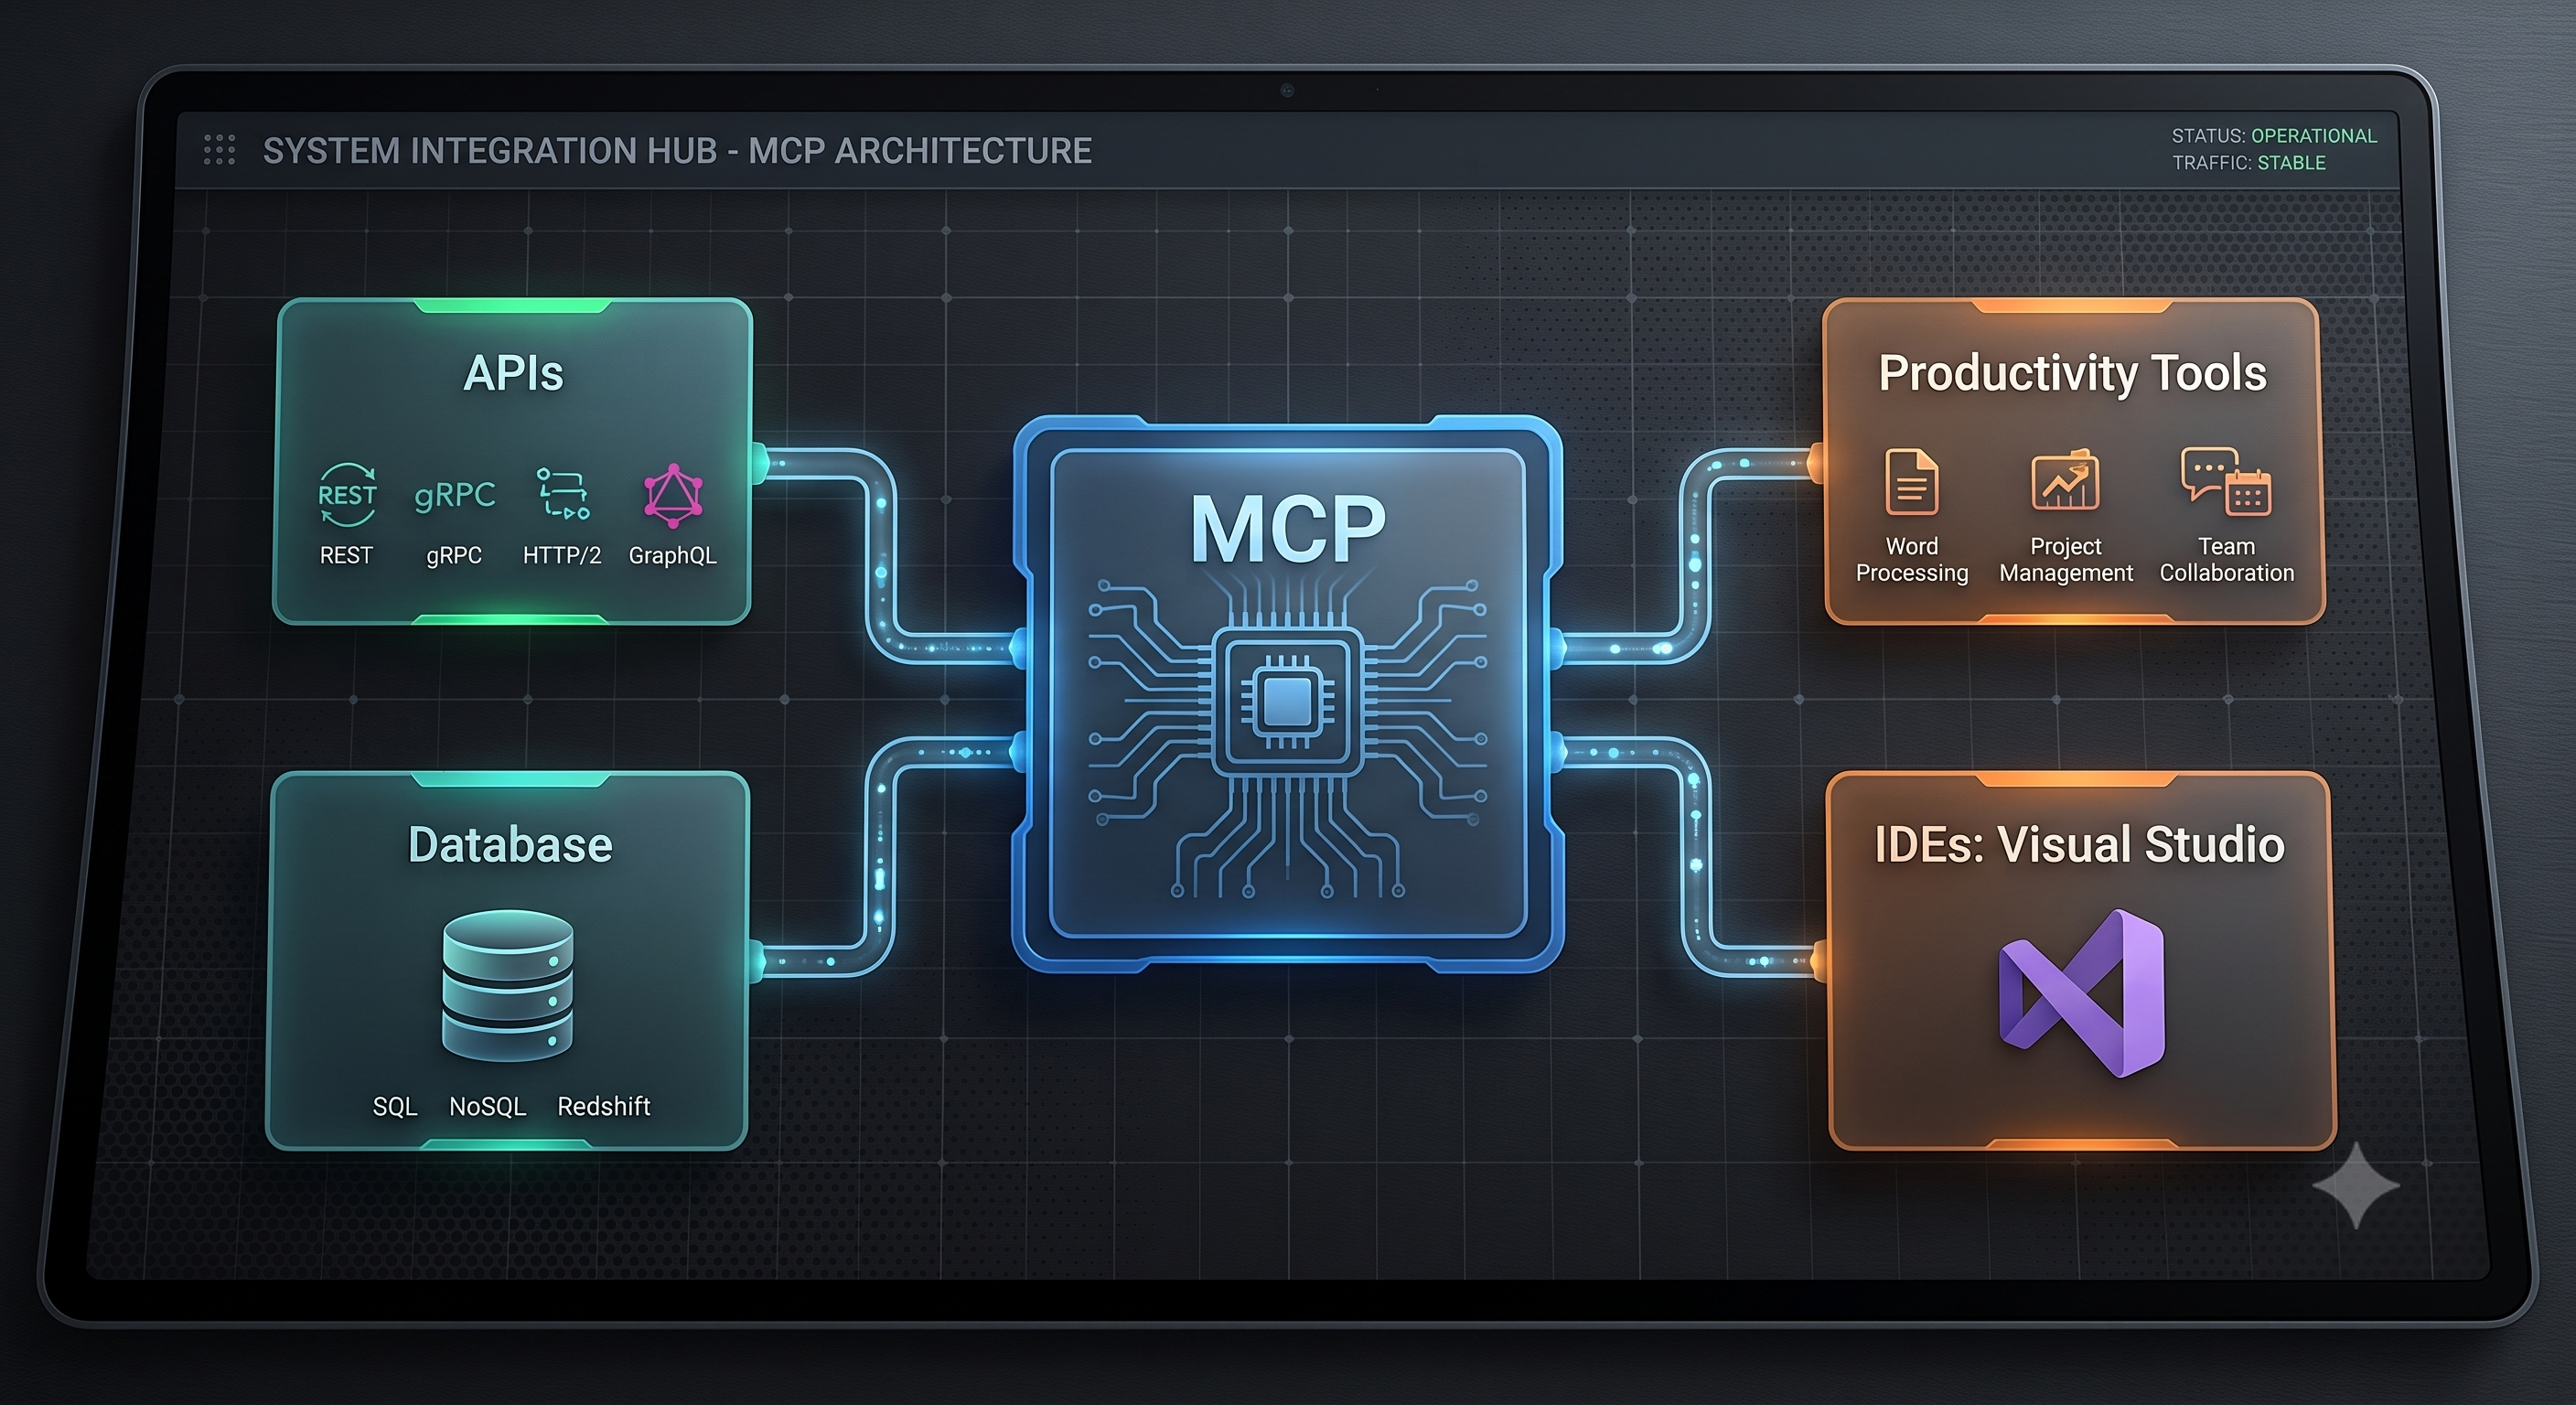
Core components of MCP is
- MCP Hosts: Applications (e.g., Claude Desktop, IDEs, AI agents) that use the protocol to integrate external tools and data.
- MCP Clients: Components handling secure, 1:1 connections with MCP servers.
- MCP Servers: Lightweight, modular services exposing specific capabilities—like file access, API queries, or data analysis—via the protocol.
- Local Data Sources: Local files, databases, and system services securely accessed by the servers to perform tasks.
- Remote Services: External APIs and internet-based systems connected through the servers.
Let’s see an example
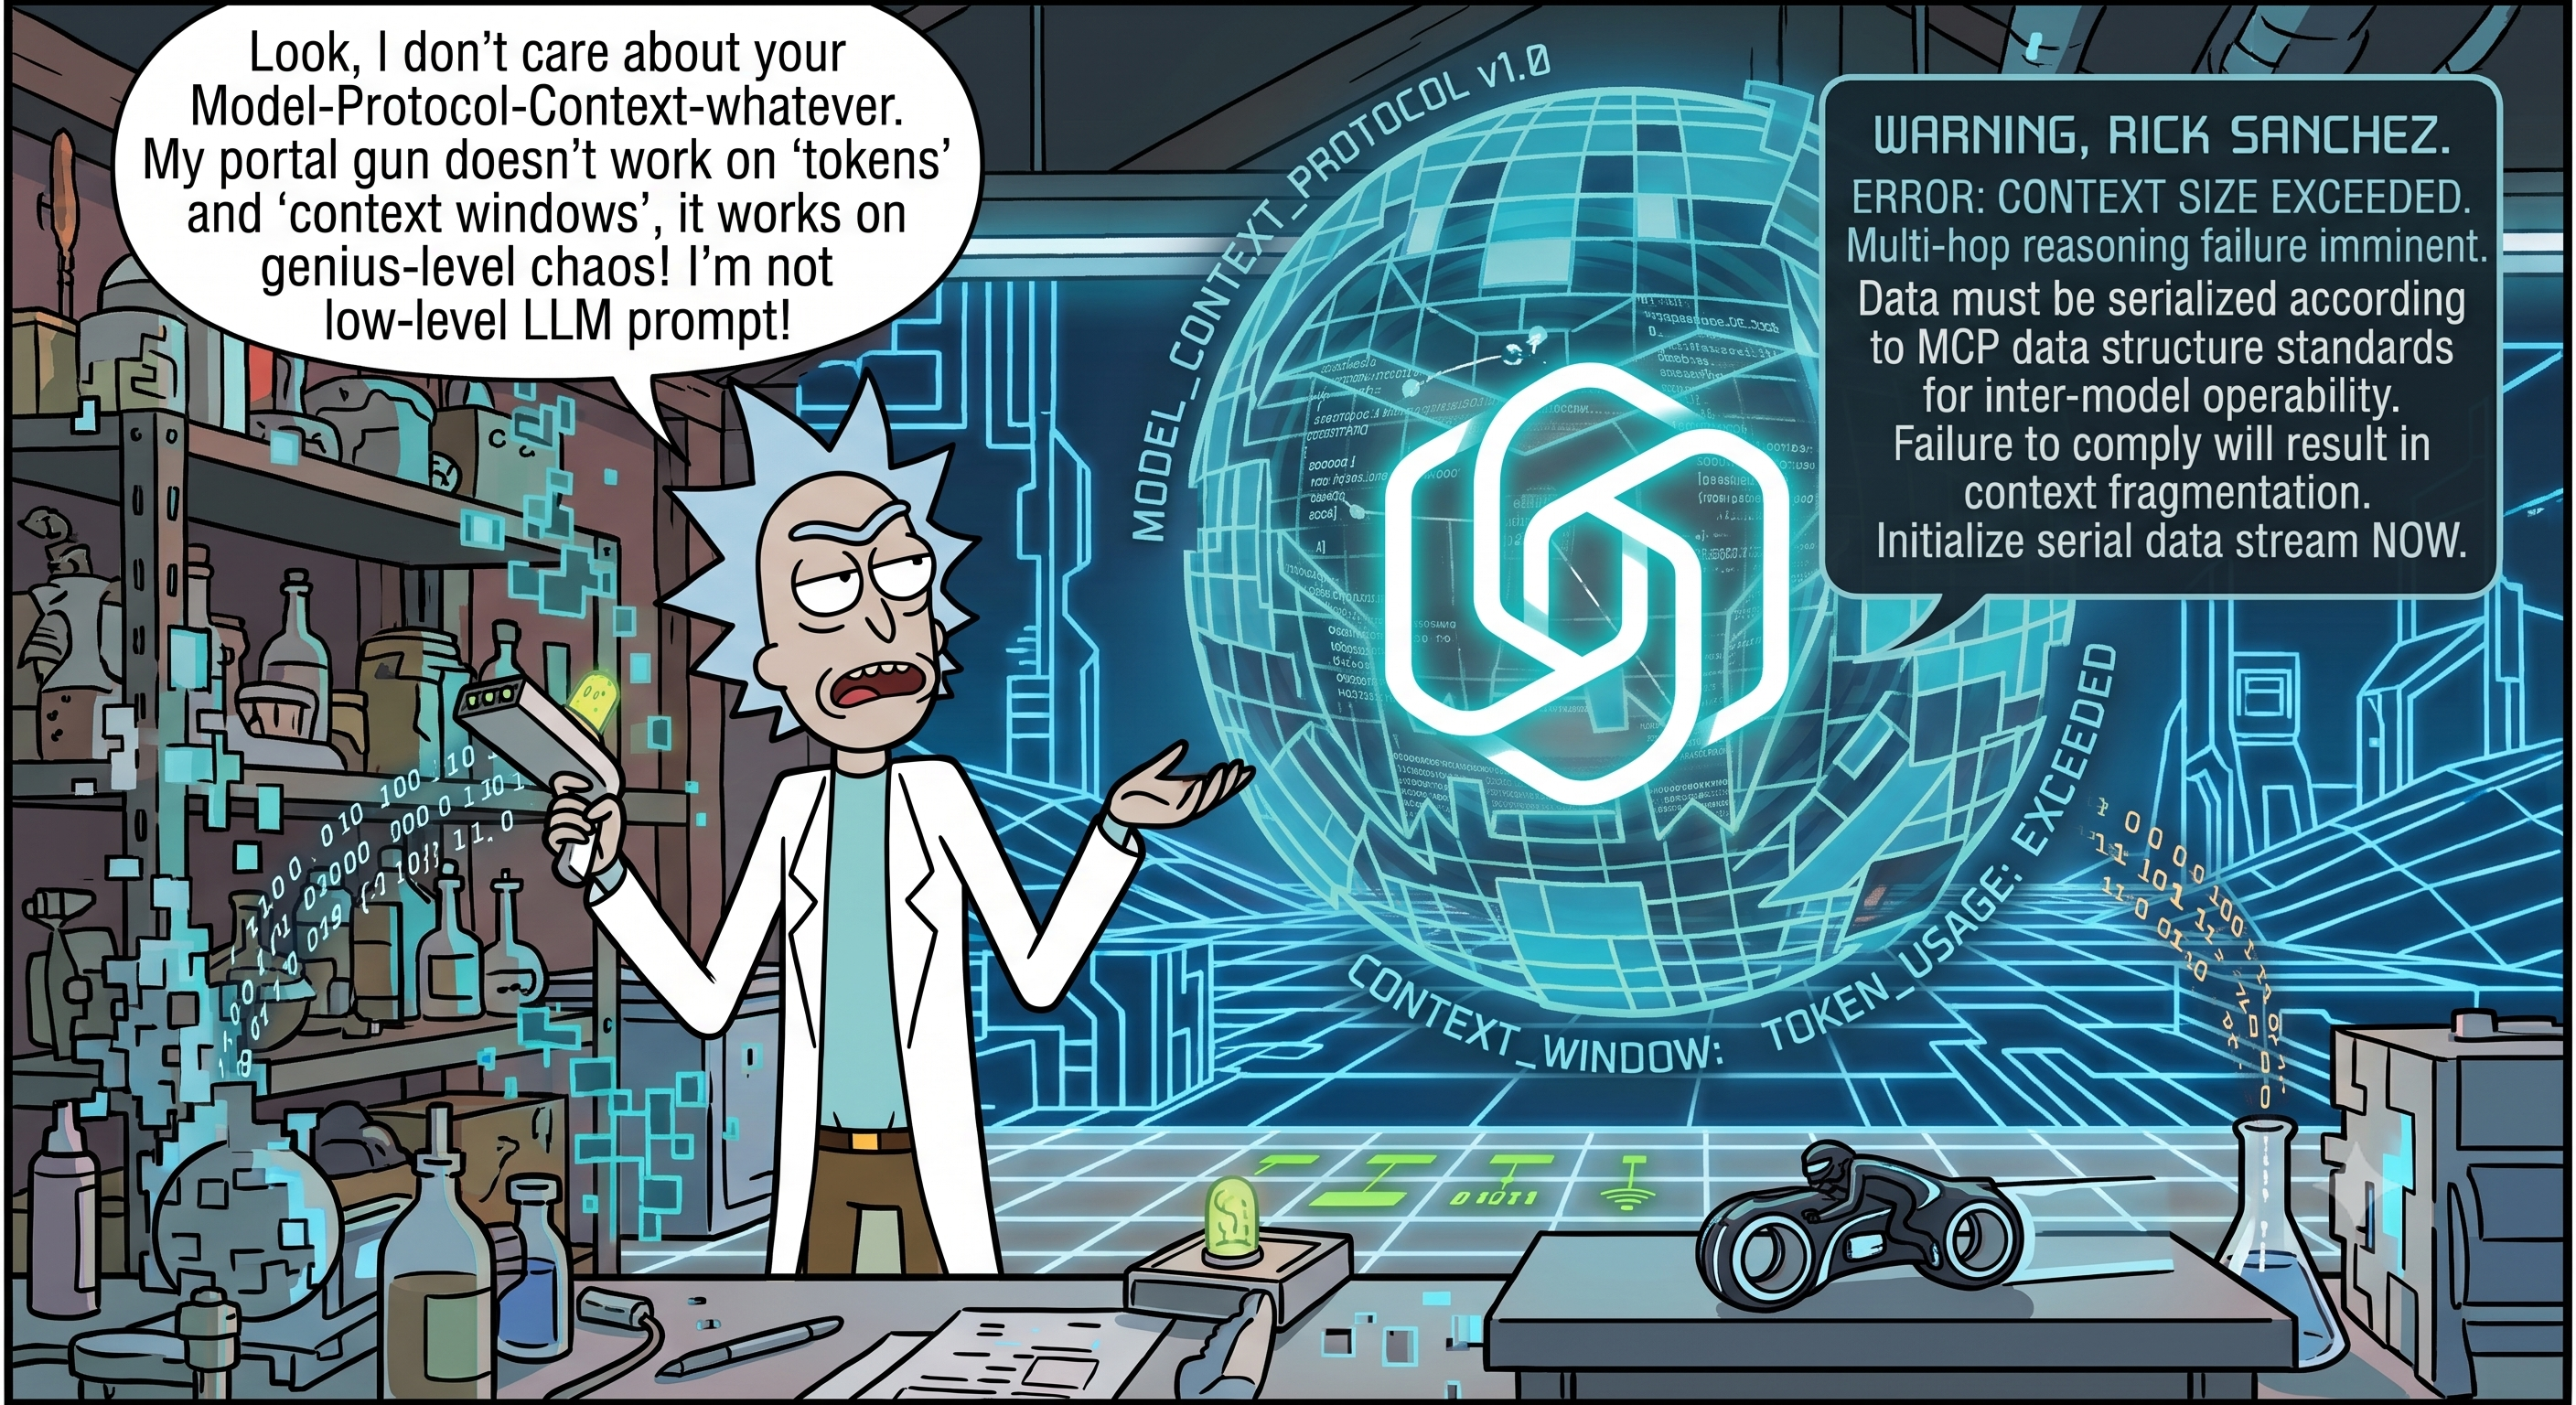
For this example I created an MCP Server for the Rick And Morty TV Show (yes, I love this show 😁). This server exposes the public Rick and Morty API as tools that an AI model can call. You can find the complete source code in my GitHub: LuisiitoDev/RickAndMortyMCP.
Creating the project
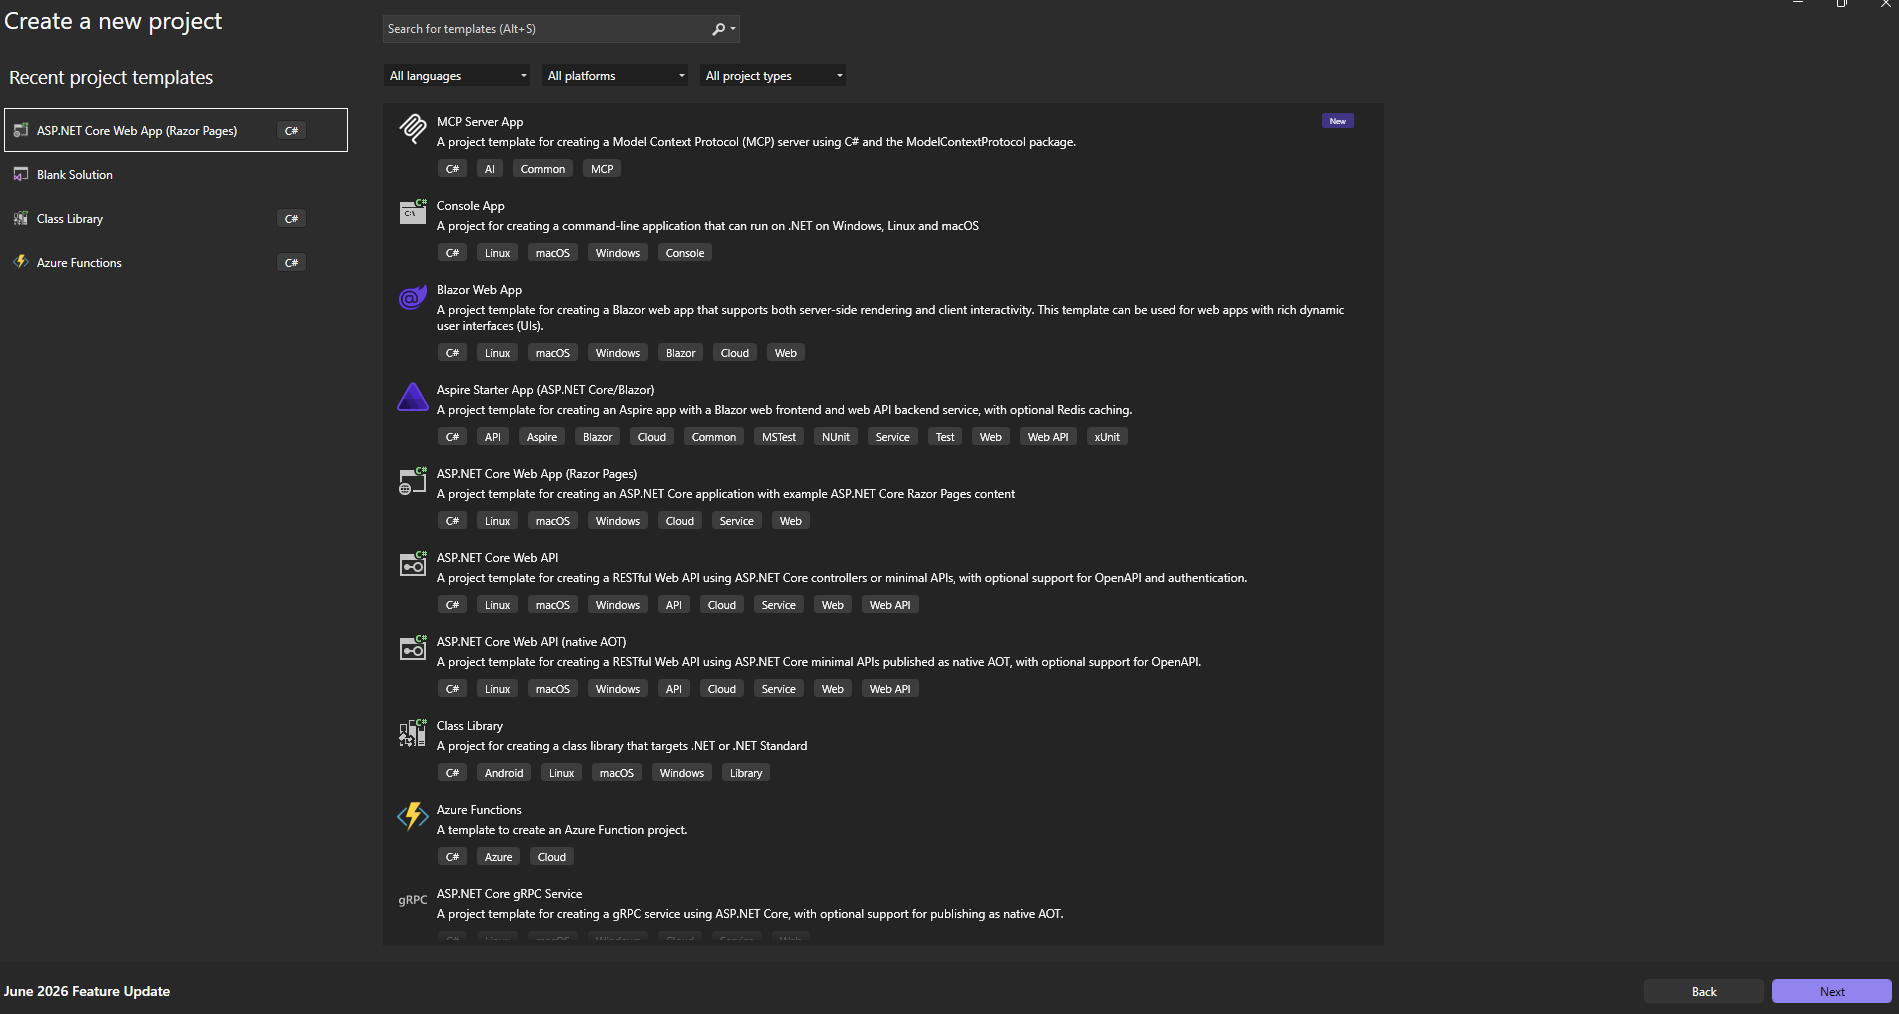
Visual Studio does not ship with the MCP template by default, so first of all we need to execute the next command in order to get the templates:
dotnet new install Microsoft.McpServer.ProjectTemplates
This will install the MCP Server App template, a project template for creating an MCP server using C# and the official ModelContextProtocol package. After that, the template will appear in the “Create a new project” dialog:
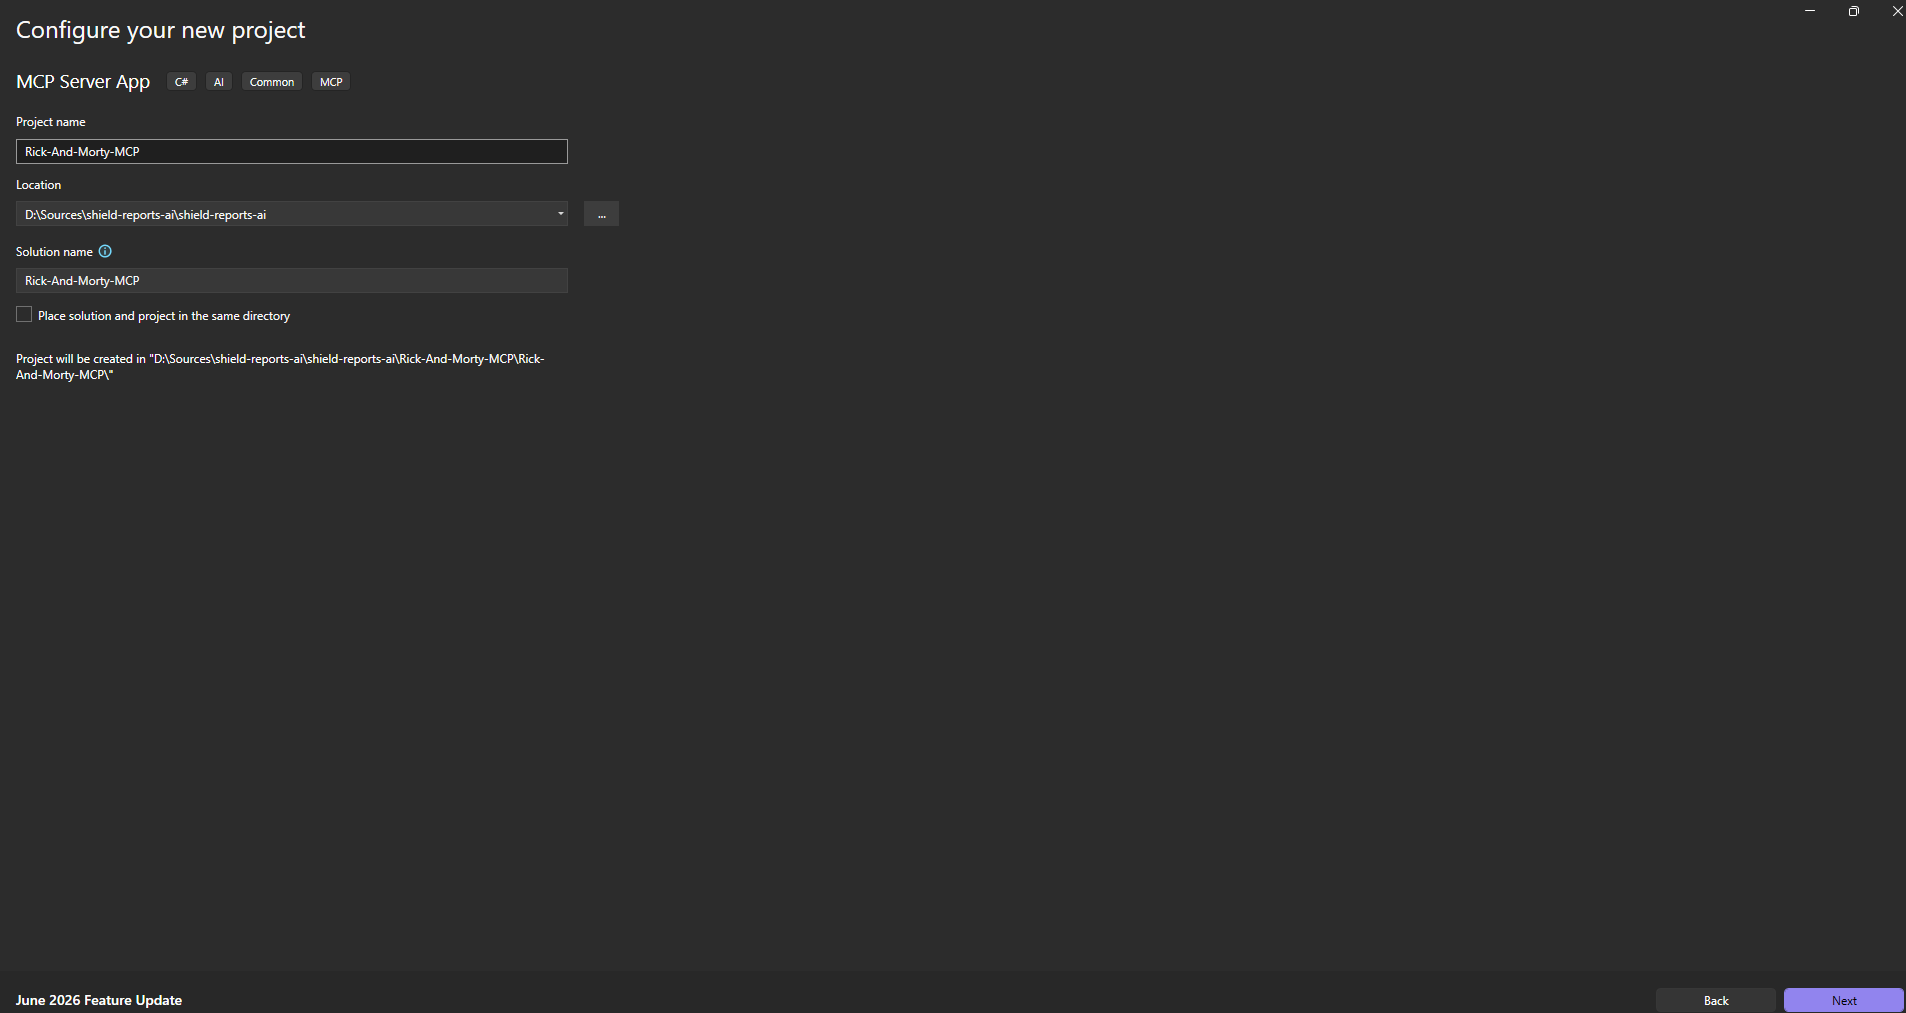
Then we give a name to the project, in my case I named it Rick-And-Morty-MCP:
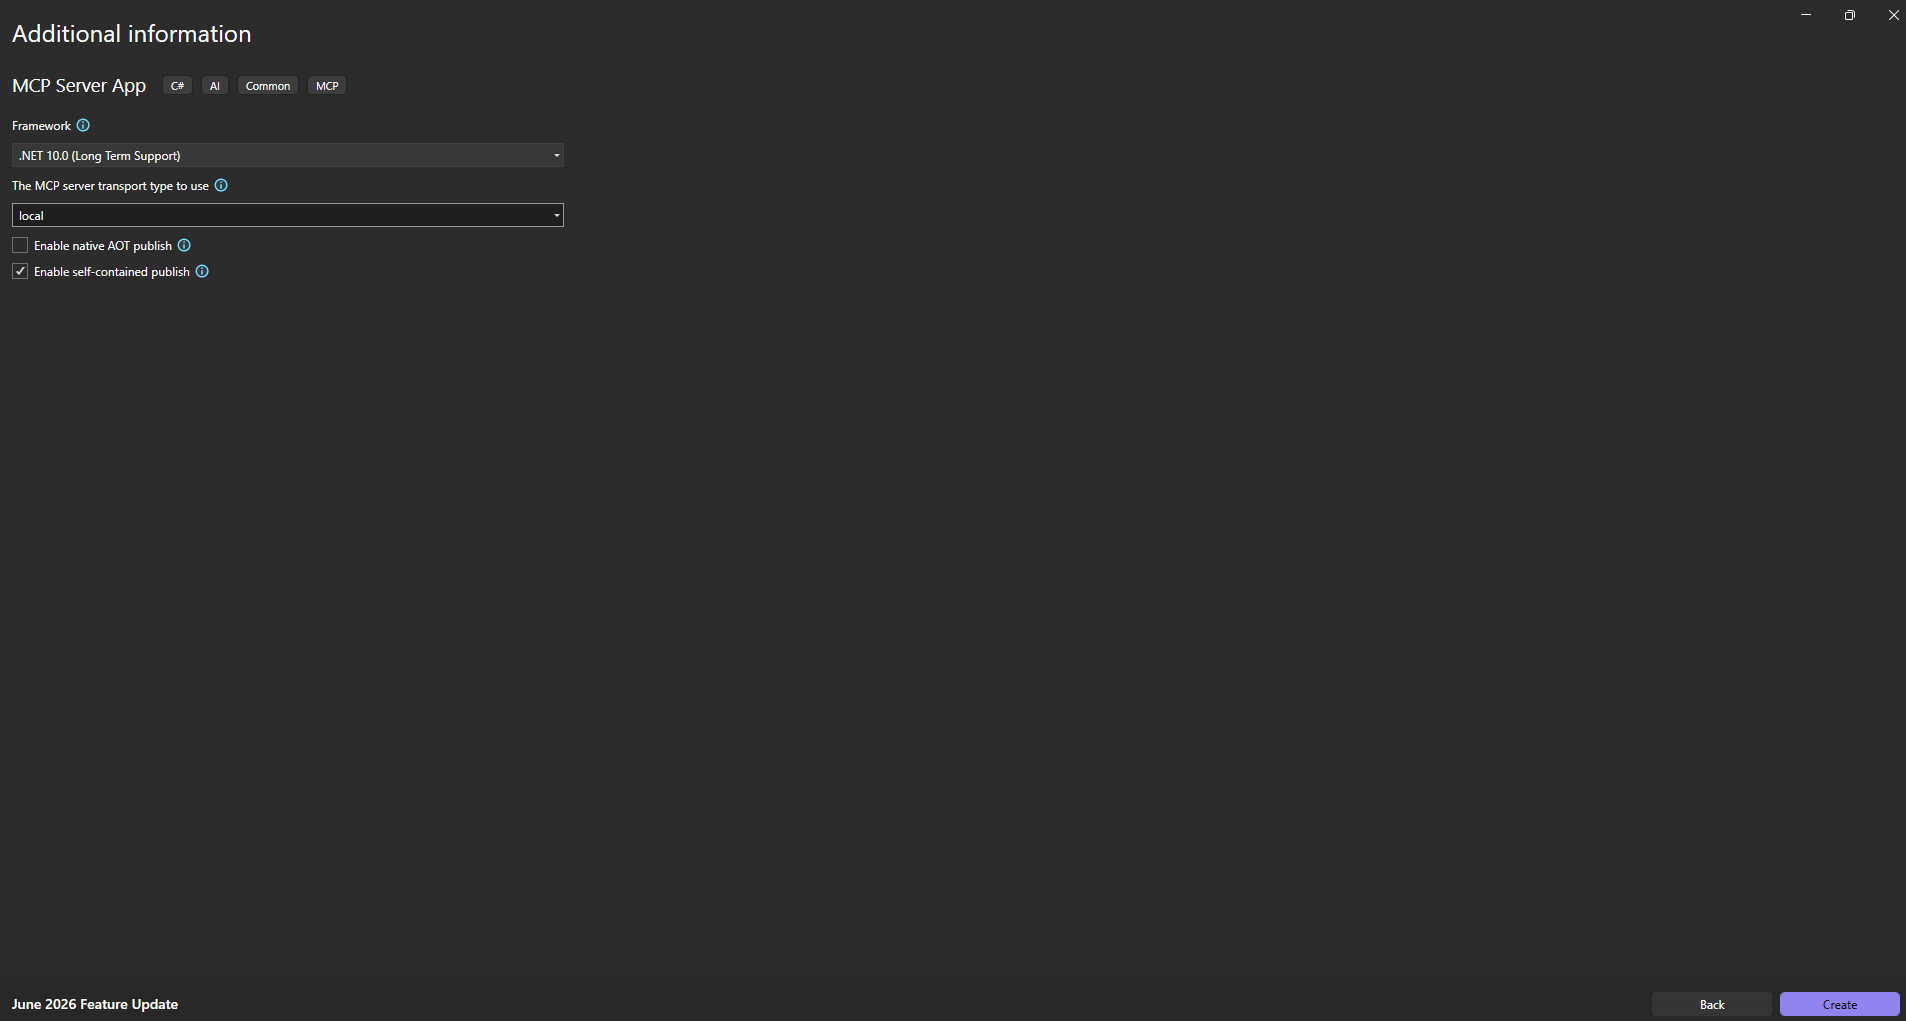
In the last step we choose the framework (.NET 10) and the transport type. I chose local, this means the server communicates over STDIO (standard input/output), the host launches the server as a child process and they exchange messages through it. This is the typical option when the server runs on the same machine as the AI application:
Implementing the tools
The template gives us a working server out of the box. All the wiring lives in Program.cs, here we register the MCP server, tell it to use the STDIO transport and register our tool classes. I also used Refit to create a typed HTTP client for the Rick and Morty API, I recommend you this library, it is really useful:
var builder = Host.CreateApplicationBuilder(args);

builder.Logging.AddConsole(o => o.LogToStandardErrorThreshold = LogLevel.Trace);

builder.Services
    .AddRefitClient<IRickAndMortyService>()
    .ConfigureHttpClient(c => c.BaseAddress = new Uri("https://rickandmortyapi.com/api"));

builder.Services
    .AddMcpServer()
    .WithStdioServerTransport()
    .WithTools<RandomNumberTools>()
    .WithTools<RickAndMortyTools>();

await builder.Build().RunAsync();
Exposing a tool is really simple, we only need to decorate a method with [McpServerTool]. Something important here: the [Description] attributes are not just documentation, they are sent to the AI model and the model uses them to decide when to call each tool and how to fill the parameters, so write them carefully!
internal class RickAndMortyTools(IRickAndMortyService rickAndMortyService)
{
    [McpServerTool]
    [Description("Gets a page of characters from the Rick And Morty TV Show, optionally filtered by name, status, species, type or gender")]
    public Task<PagedResponse<Character>> GetCharacters(
        [Description("Page number")] int? page = null,
        [Description("Filter by name")] string? name = null,
        [Description("Filter by status (alive, dead or unknown)")] string? status = null,
        [Description("Filter by species")] string? species = null,
        [Description("Filter by type")] string? type = null,
        [Description("Filter by gender (female, male, genderless or unknown)")] string? gender = null)
        => rickAndMortyService.GetCharactersAsync(page, name, status, species, type, gender);

    [McpServerTool]
    [Description("Gets a single episode from the Rick And Morty TV Show by its id")]
    public Task<Episode> GetEpisode([Description("The episode id")] int id)
        => rickAndMortyService.GetEpisodeAsync(id);

    // ... GetCharacter and GetEpisodes follow the same pattern
}
And that’s it! No JSON schemas to write by hand, no protocol plumbing, the SDK generates the tool definitions from the method signatures and the descriptions.
Testing with MCP Inspector
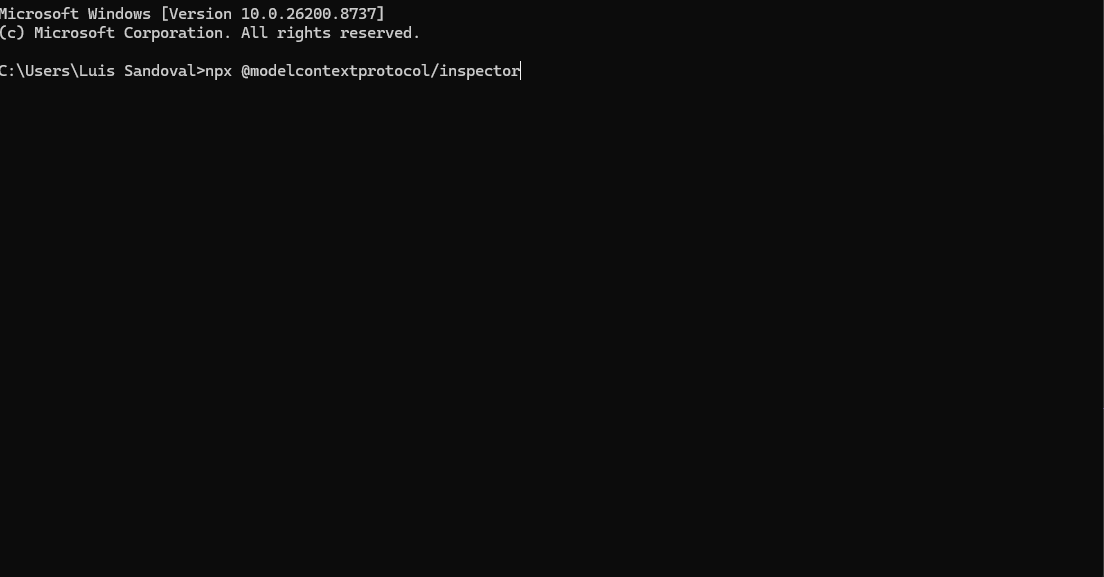
Before connecting the server to a real AI application, we can test it with the MCP Inspector, an official tool for testing and debugging MCP servers. We only need to run the next command:
npx @modelcontextprotocol/inspector
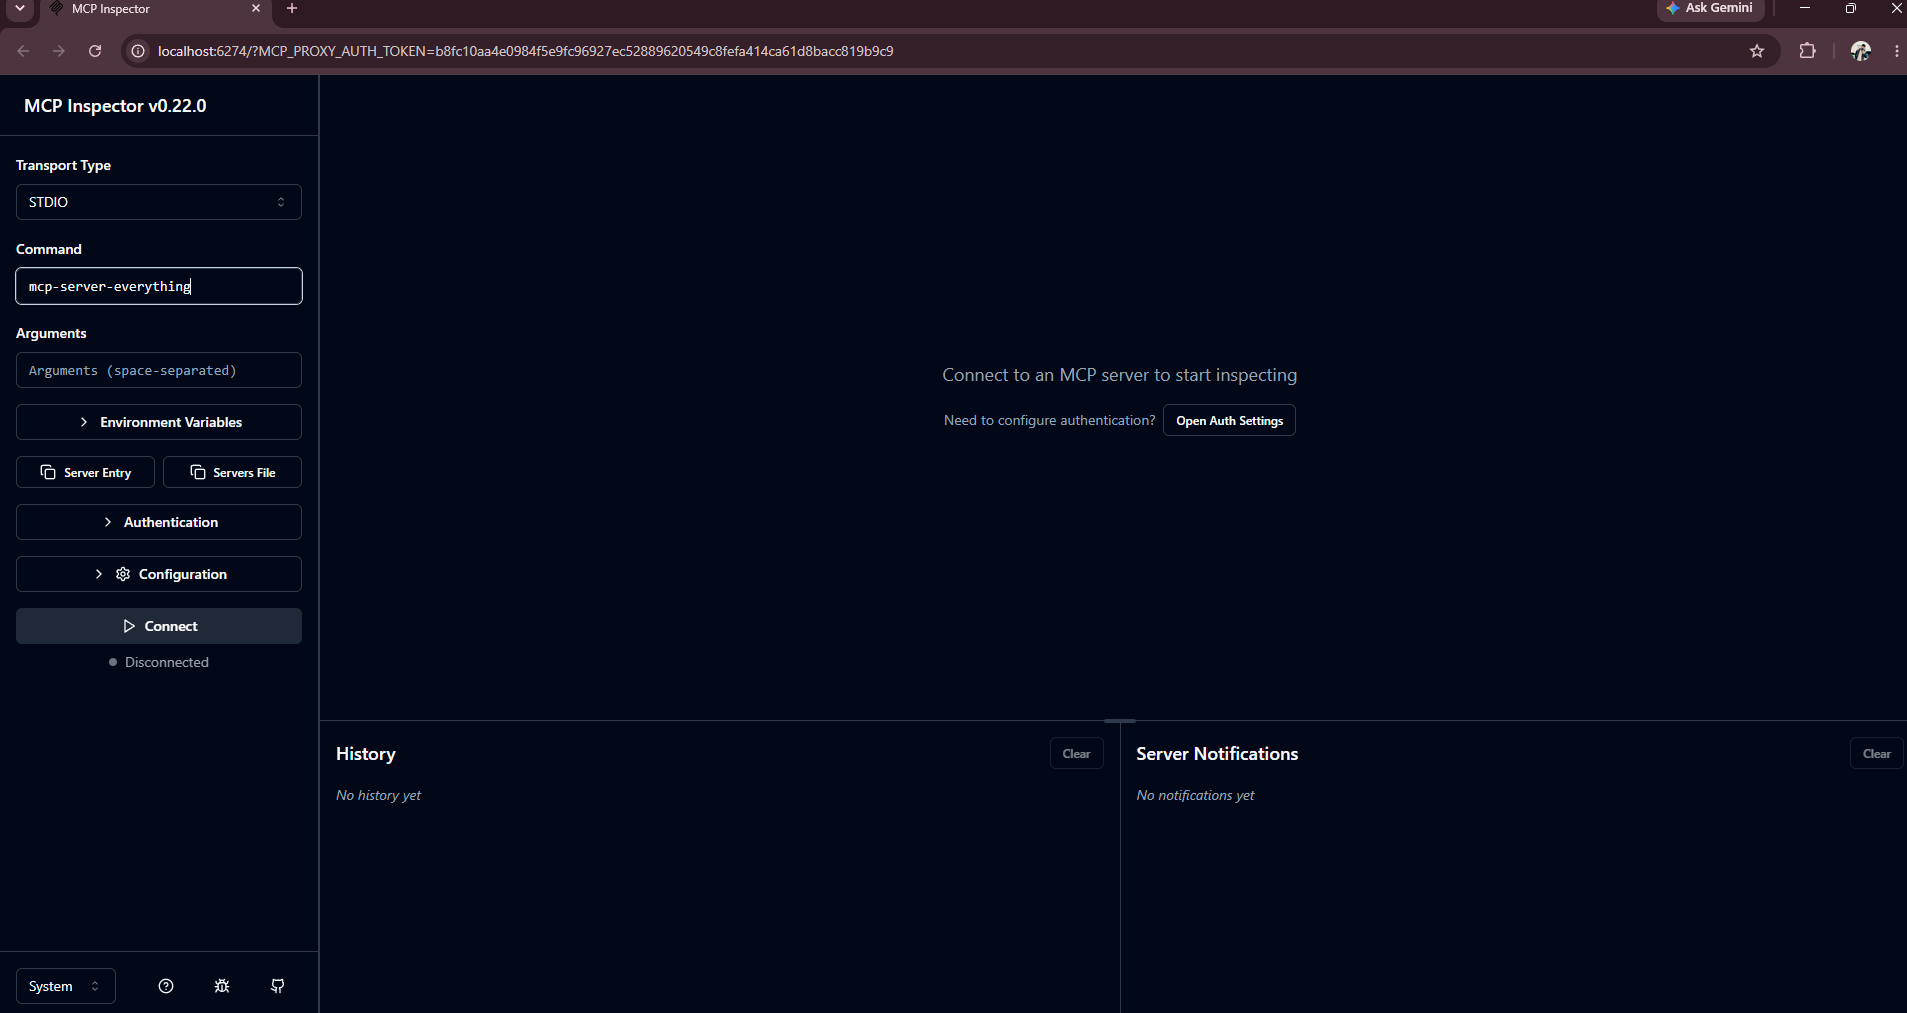
The Inspector opens in the browser. Our server uses the STDIO transport, so we configure it with the command that launches the server (in our case dotnet pointing to the dll of my MCP server) and click Connect:
Once connected, the Inspector lists all the tools that our server exposes, with the same descriptions we wrote in the C# code. We can run any tool manually, here I ran get_episode with id = 1 and I got the episode “Pilot” (S01E01) directly from the Rick and Morty API:
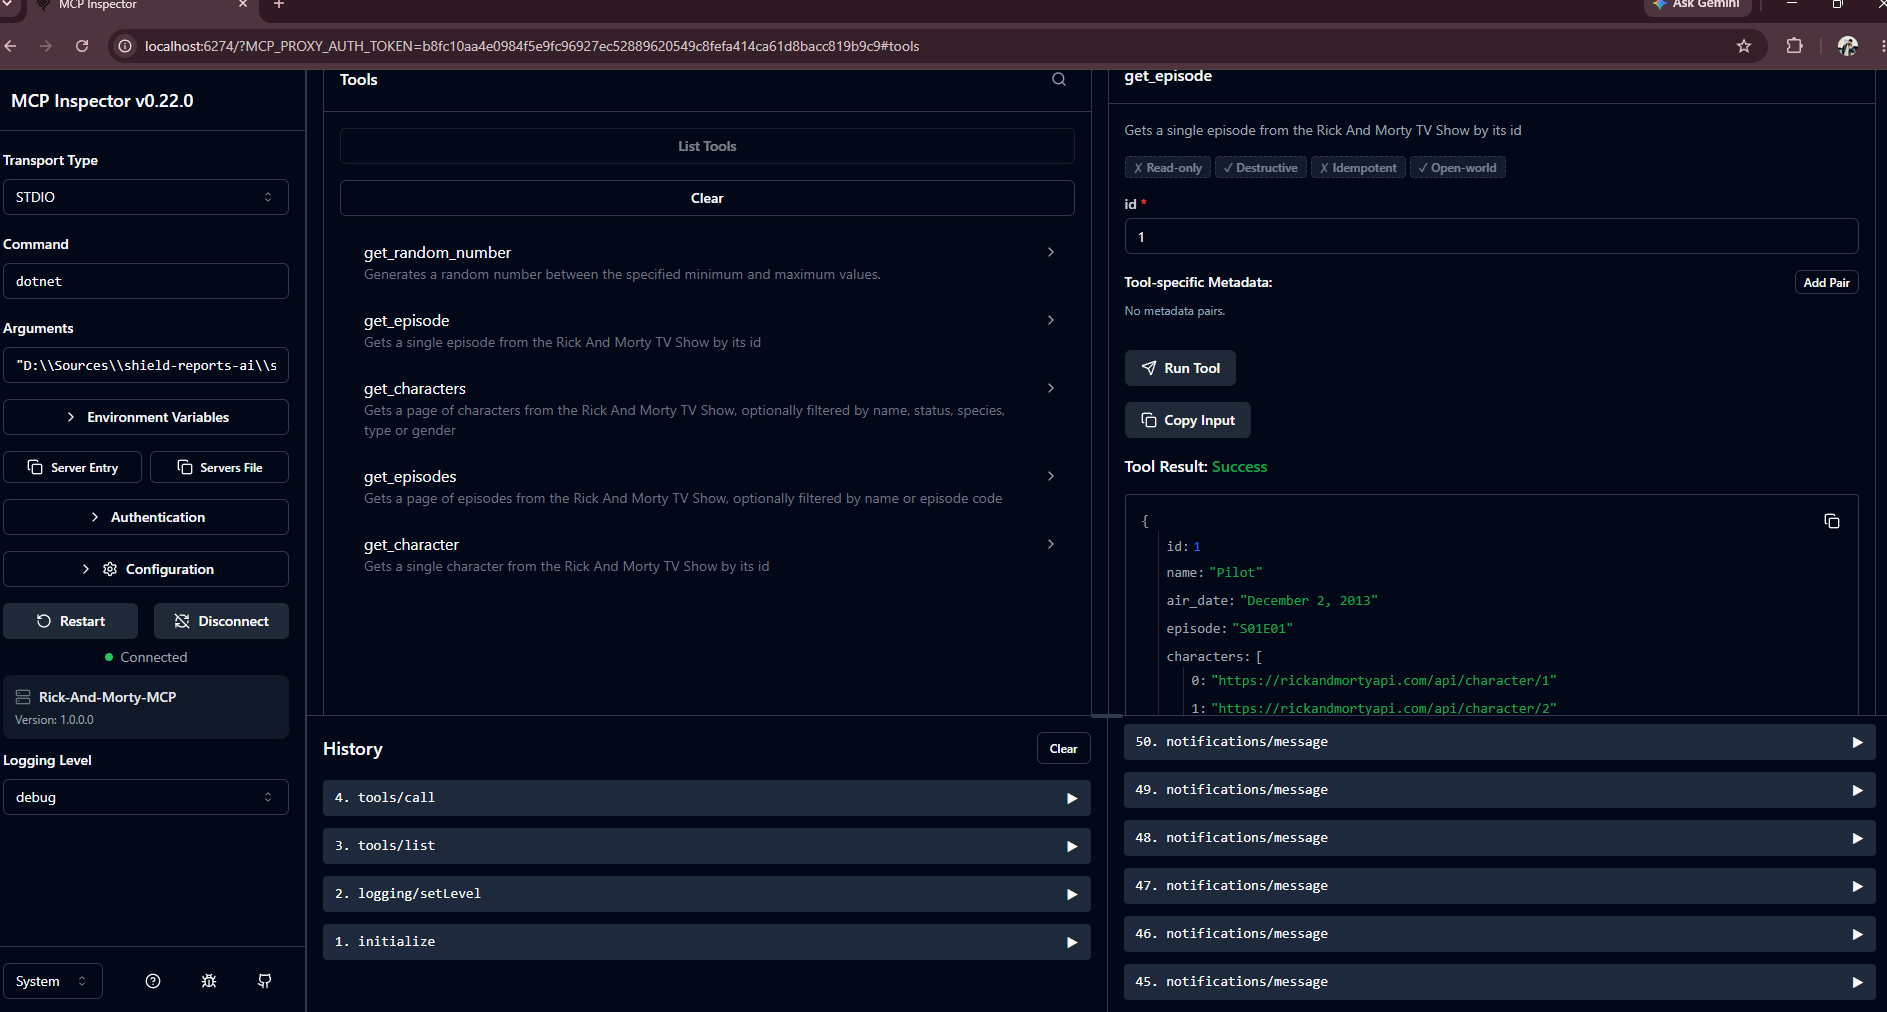
In the Tools tab we can see everything the server offers: get_characters, get_character, get_episodes, get_episode, and also the get_random_number sample tool that comes with the template:
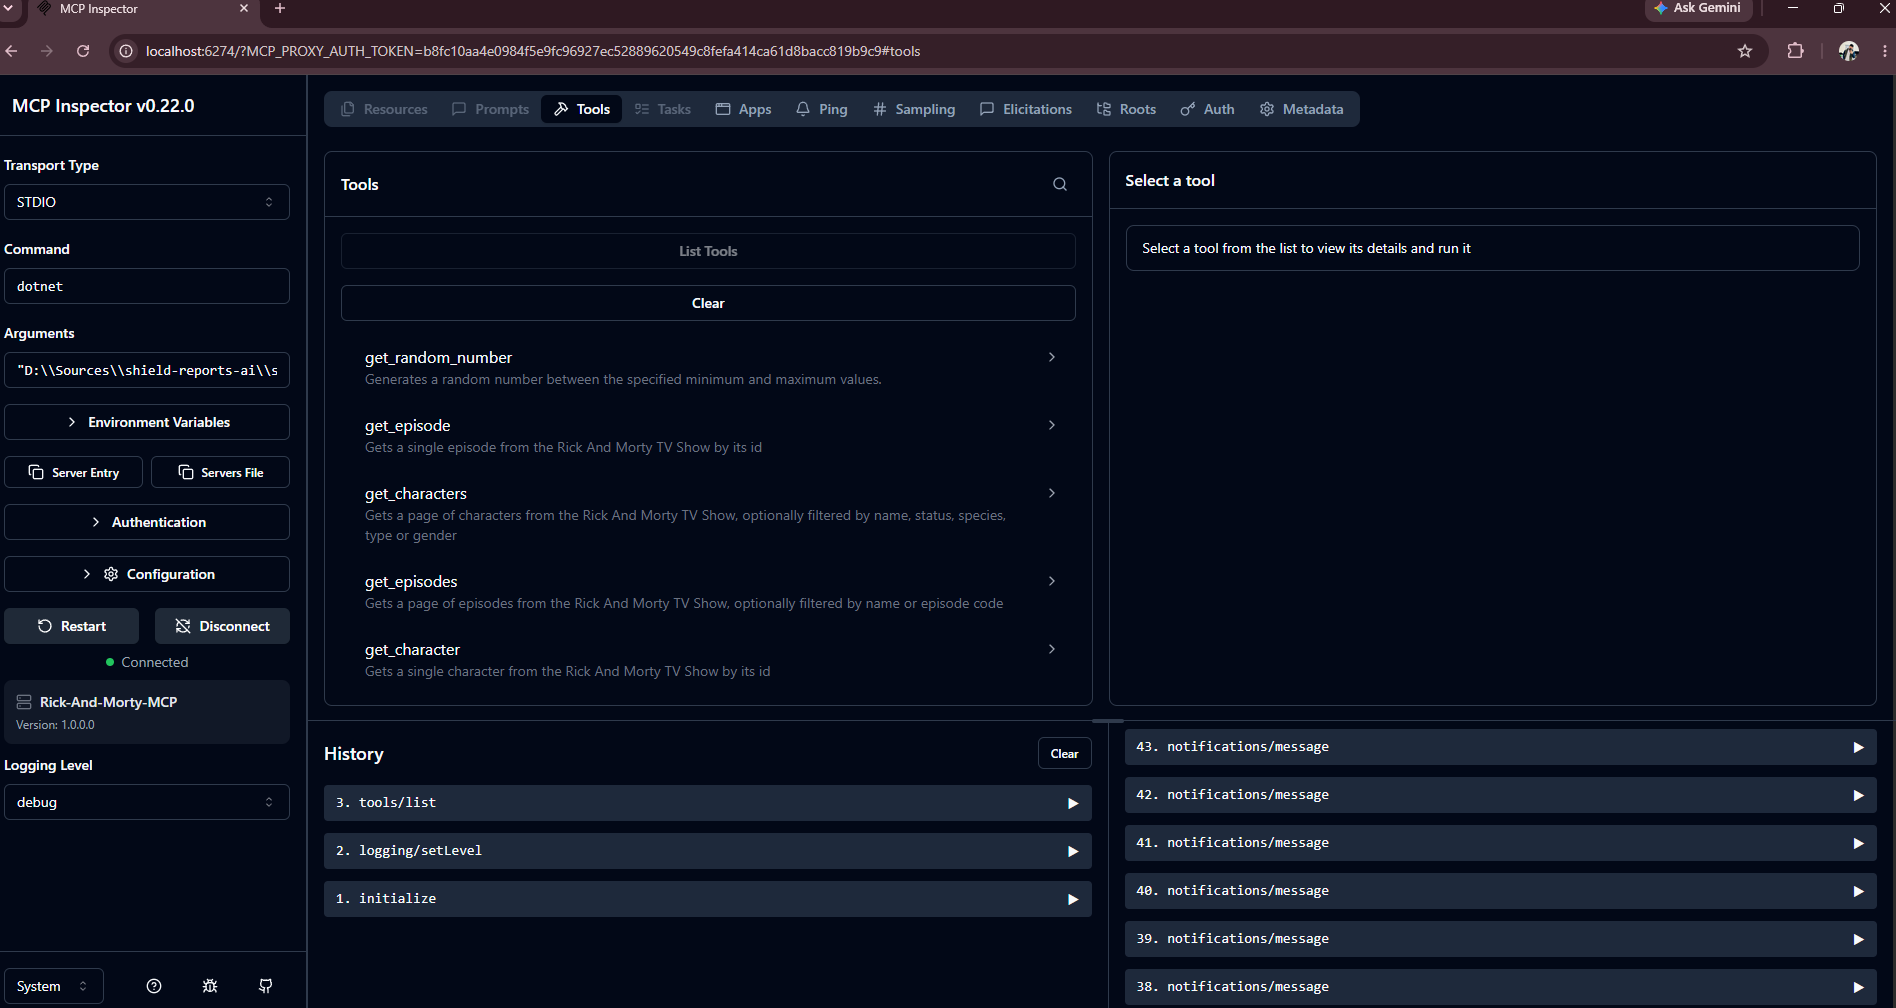
I recommend you to always test your MCP servers with the Inspector before connecting them to a real AI application, it will save you a lot of time!
Using it from GitHub Copilot
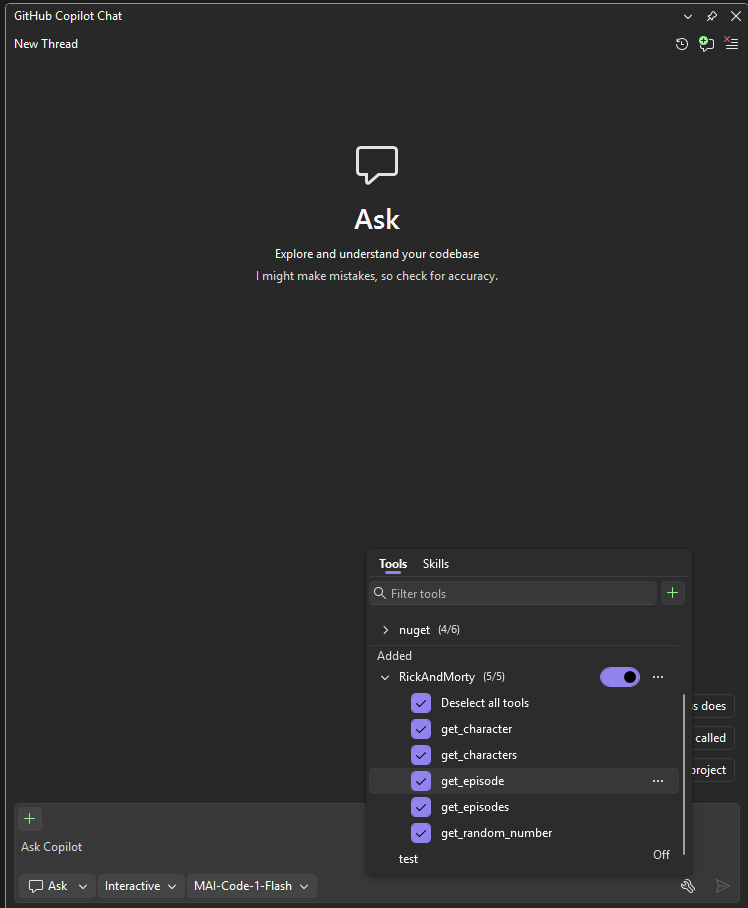
Now the fun part! Let’s connect the server to a real AI application. GitHub Copilot Chat in Visual Studio supports MCP servers, so after registering our server, the five tools appear in the tools panel ready to be used:
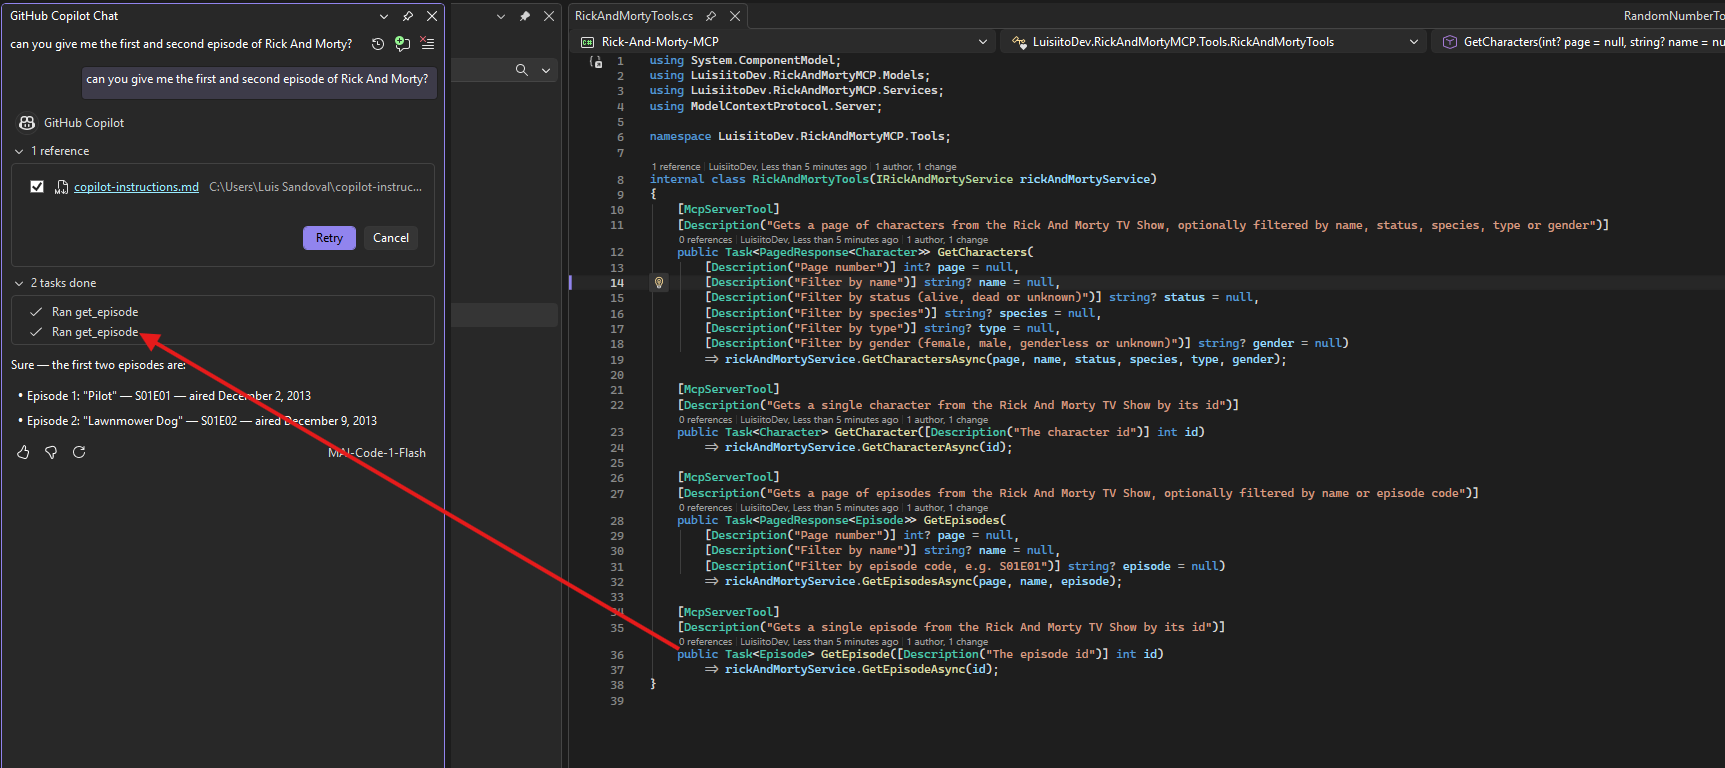
Let’s ask Copilot something that it can’t answer reliably by itself: “can you give me the first and second episode of Rick And Morty?”. Look what happens, Copilot decides by itself to call the get_episode tool twice (one time for each id), and each call maps directly to the C# method that we wrote:
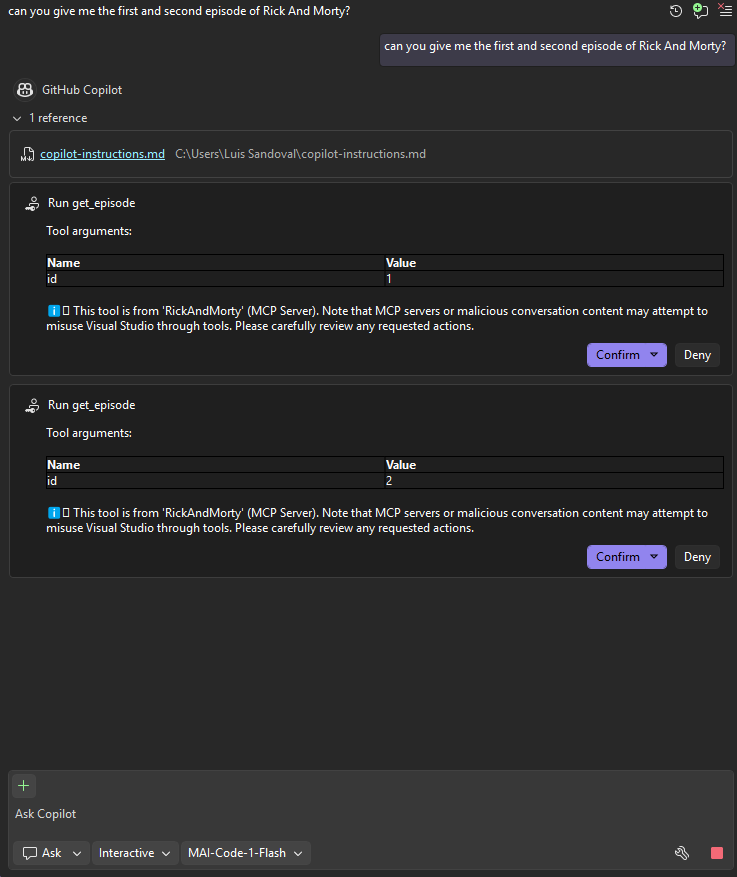
Something I really like is that security is part of the flow: before each tool call, Copilot asks for confirmation and shows exactly which tool it wants to run and with which arguments. Nothing executes without our approval:
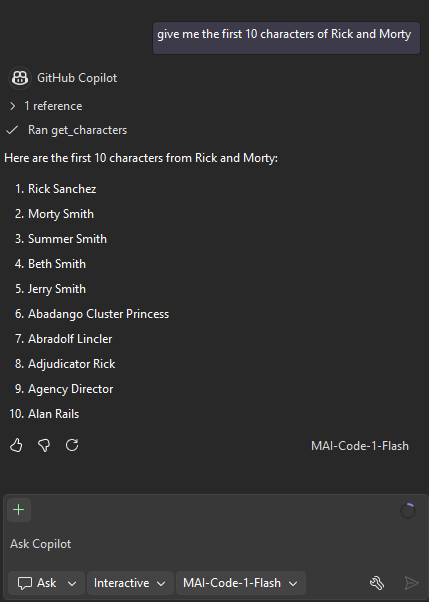
The answer comes directly from the live API: Episode 1: “Pilot” — S01E01 and Episode 2: “Lawnmower Dog” — S01E02. Let’s try another question, this time the first 10 characters, and Copilot picks the get_characters tool with page = 1:
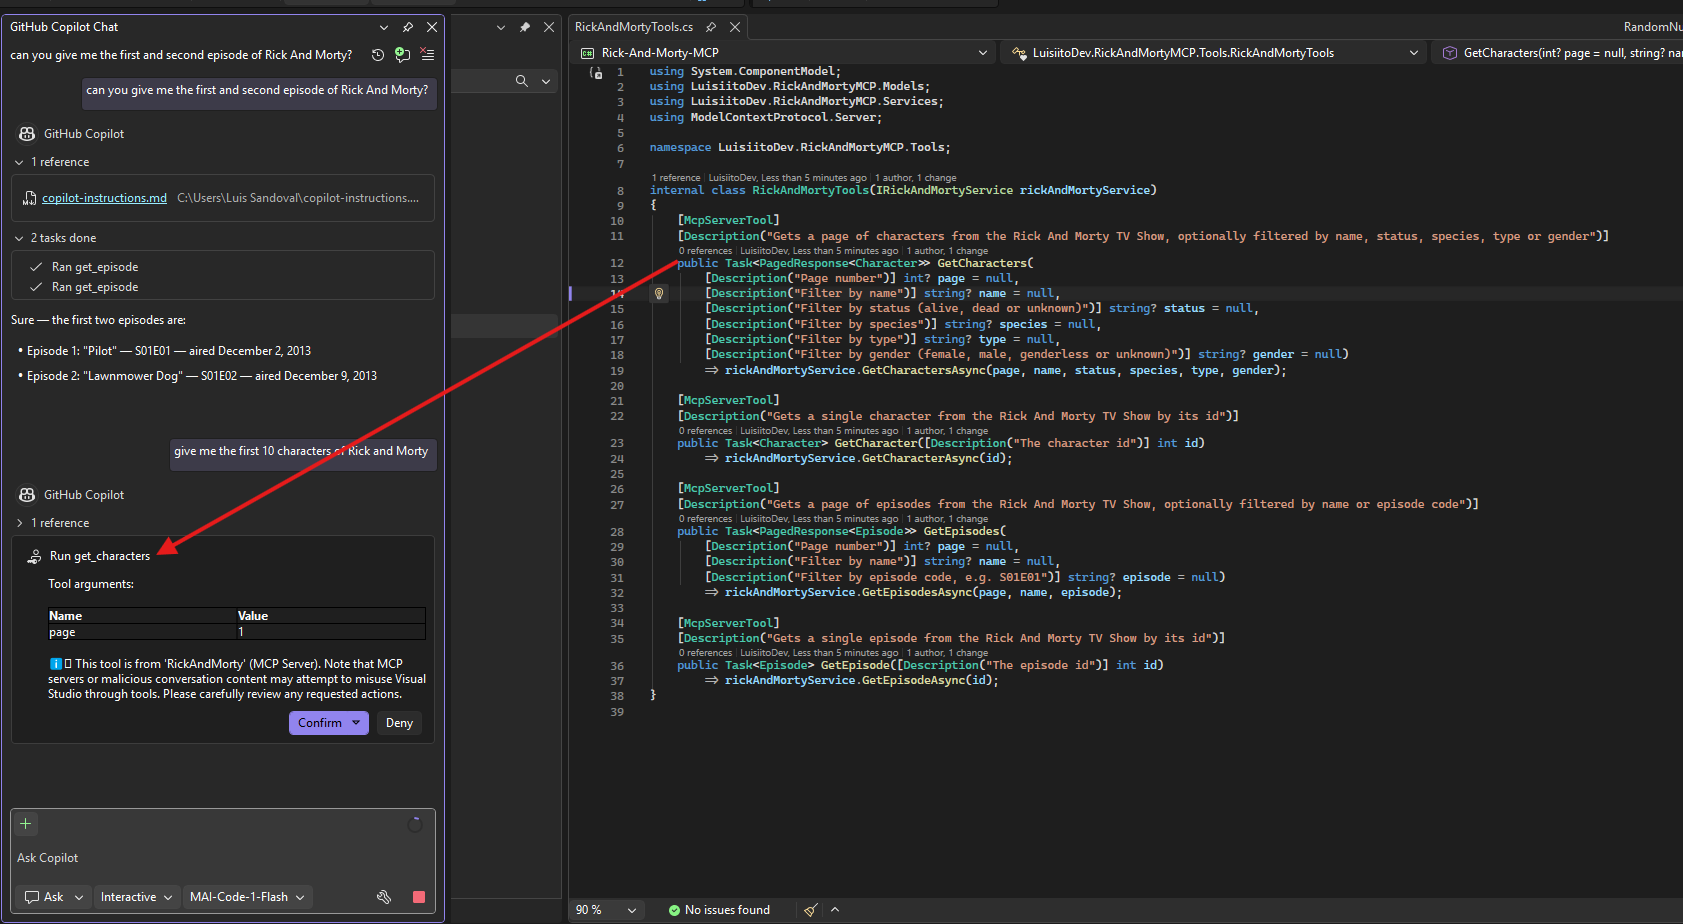
And there it is! Rick Sanchez, Morty Smith, Summer Smith and the rest of the crew, obtained in real time through our MCP server:
Happy coding!😄