Azure AD B2C
Azure Active Directory B2C: Part I
Azure Active Directory B2C (Business to Consumer) is an identity manager which allows to control how our users can sign up, sign in and control their profiles using any platform like Android, iOS, SPA (Single Web Application).
In this blog, we will look forward how to enable a flow authentication with Azure AD B2C and Facebook, and how to implemented in a .NET Application.
We will follow a custom policy flow explained in Microsoft Learn.
Provisioning Facebook Application
First thing we have to do is to create a facebook application, to do it we have to go to this link Facebook for Developers
In this page we will do the next steps:
-
Create a new app:

-
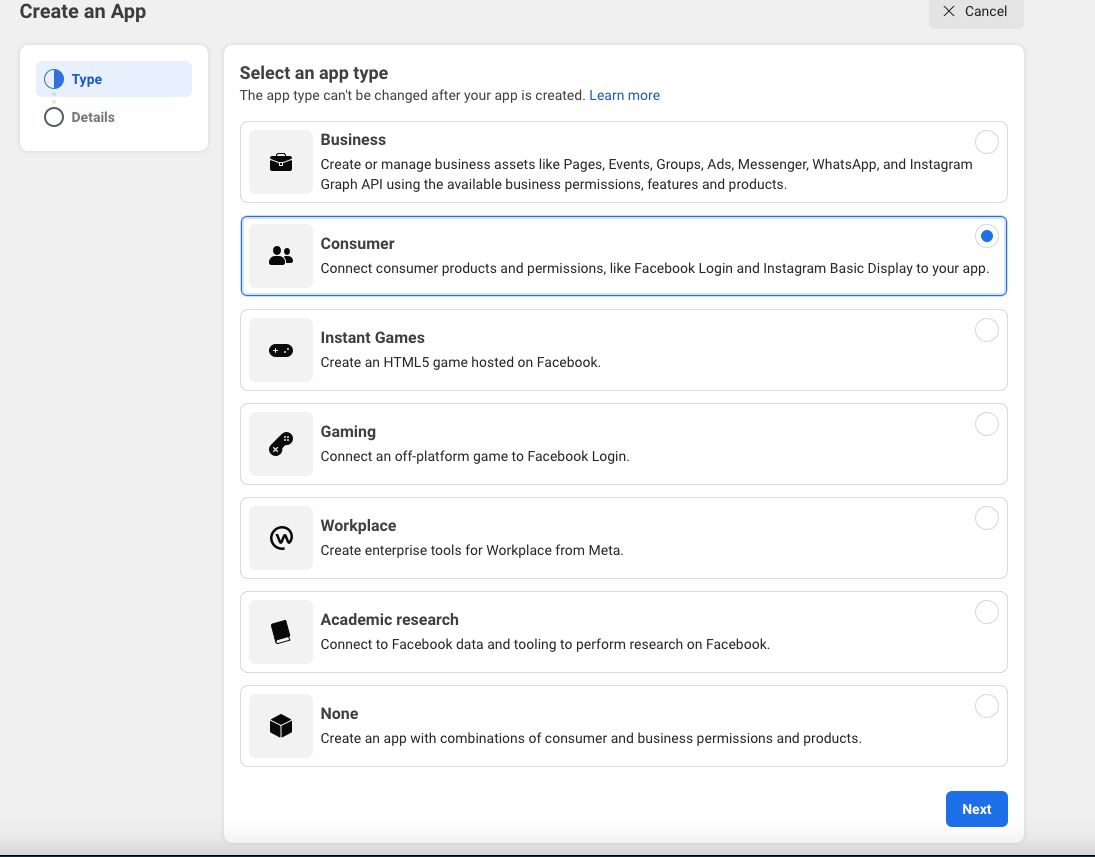
Select an app type, in this case we will select a consumer app
-
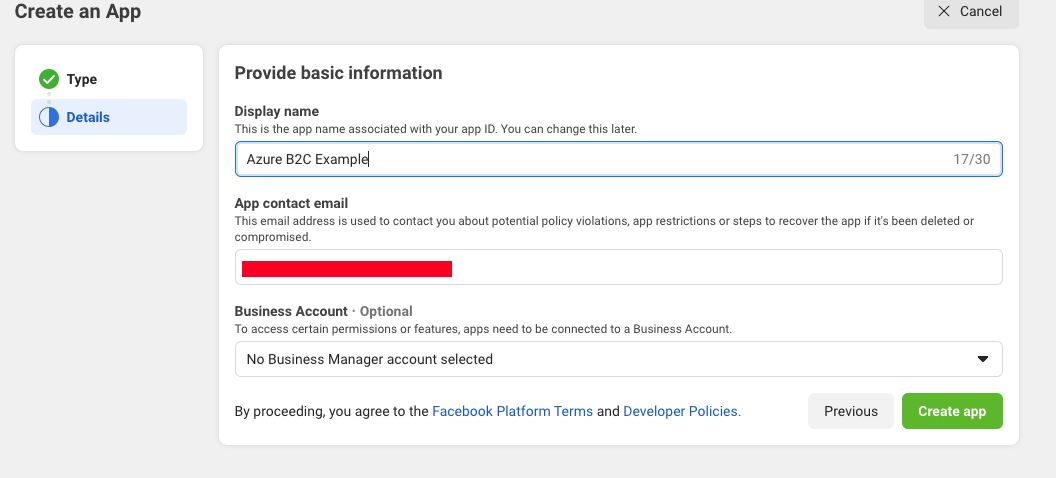
Then we will provide a basic information like it could be our app name and email.
-
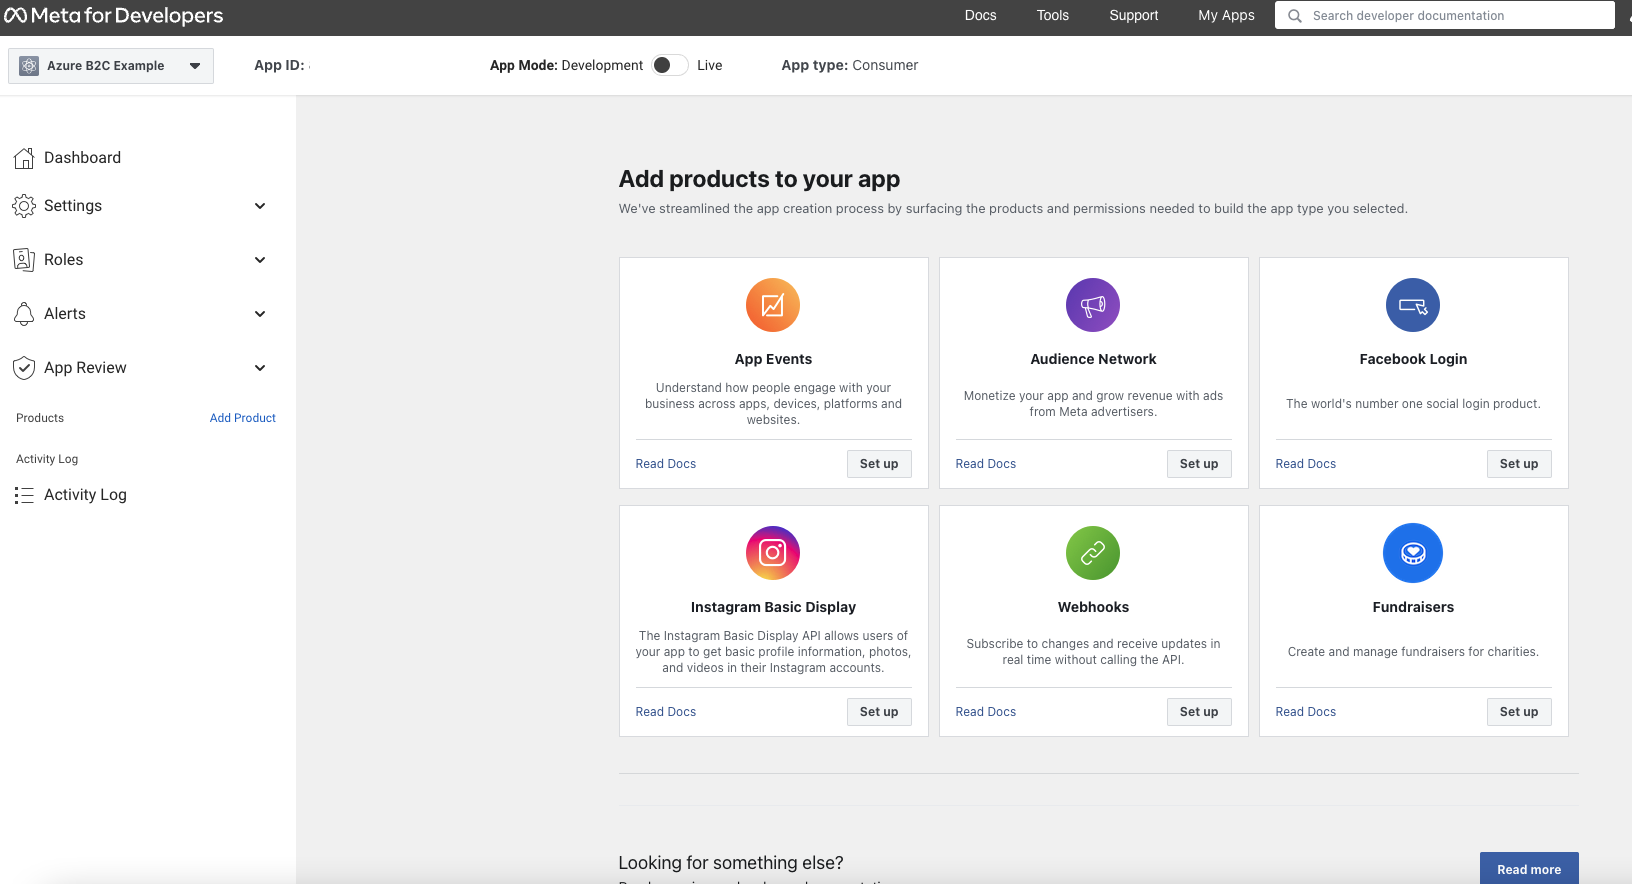
After that we will see the next page:
-
From this section we will need to copy the Application Id provided from Facebook.

The next thing that we have to do in this page is the following, we will go to the settings > Basic section, and we will see the next page:
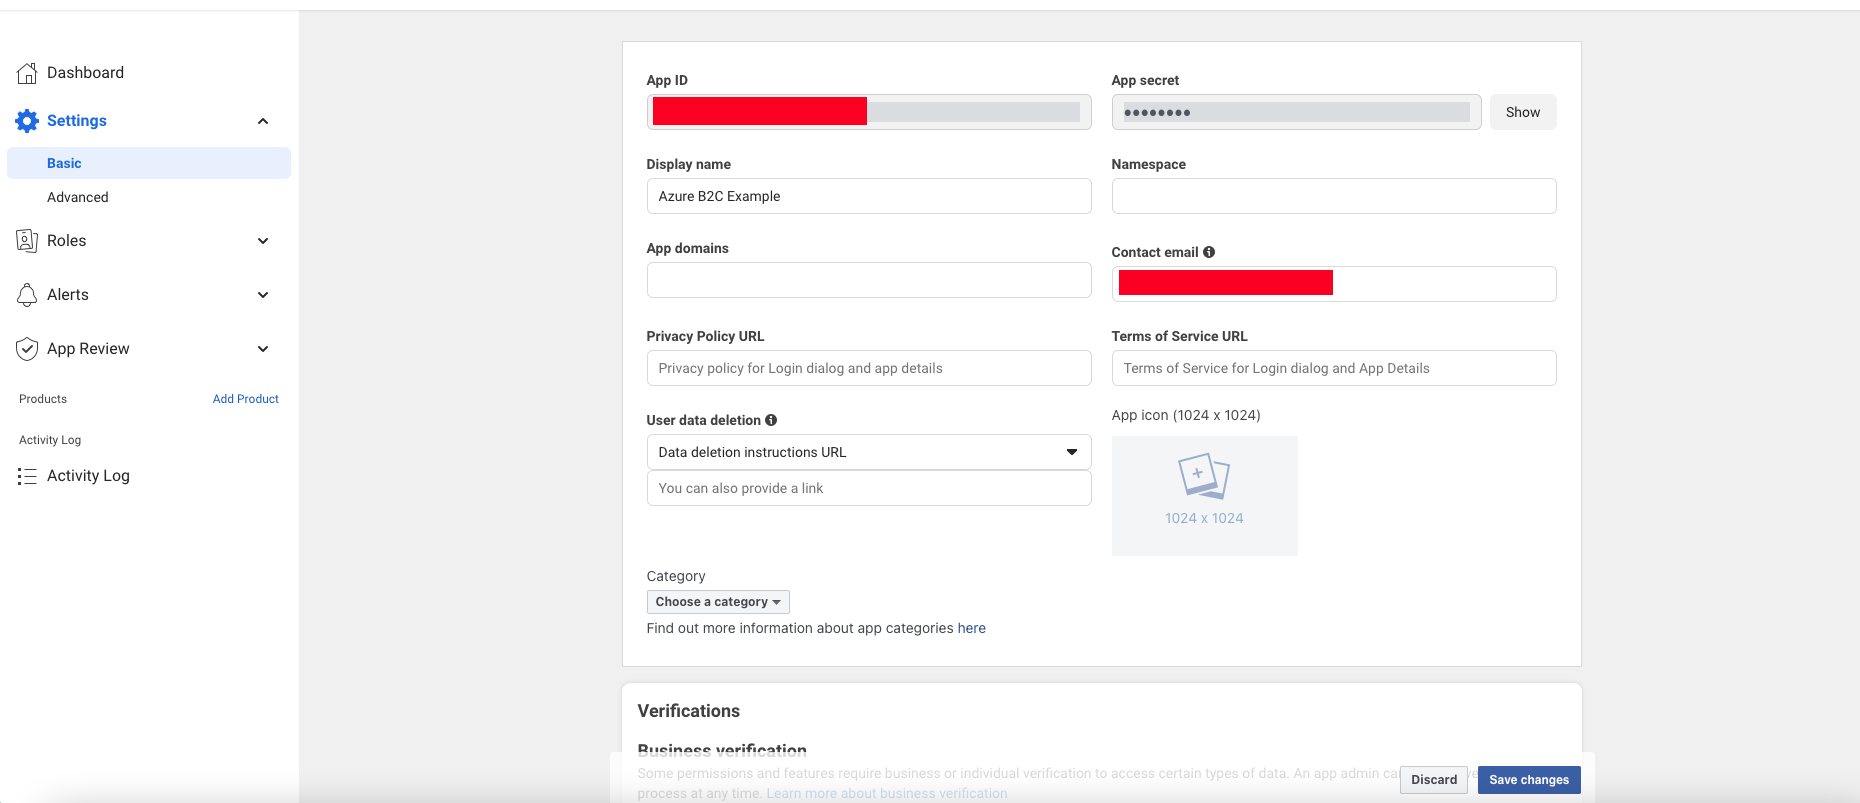
In this page we will fill the next filds:
- Privacy Policy URL
- Terms of Service URL
- User Data Delection URL
- And select the category
Also we will add a plaform this section is in the bottom of the page, and we will add a web platform and set up the website our app. For this example we configured the localhost of our web.

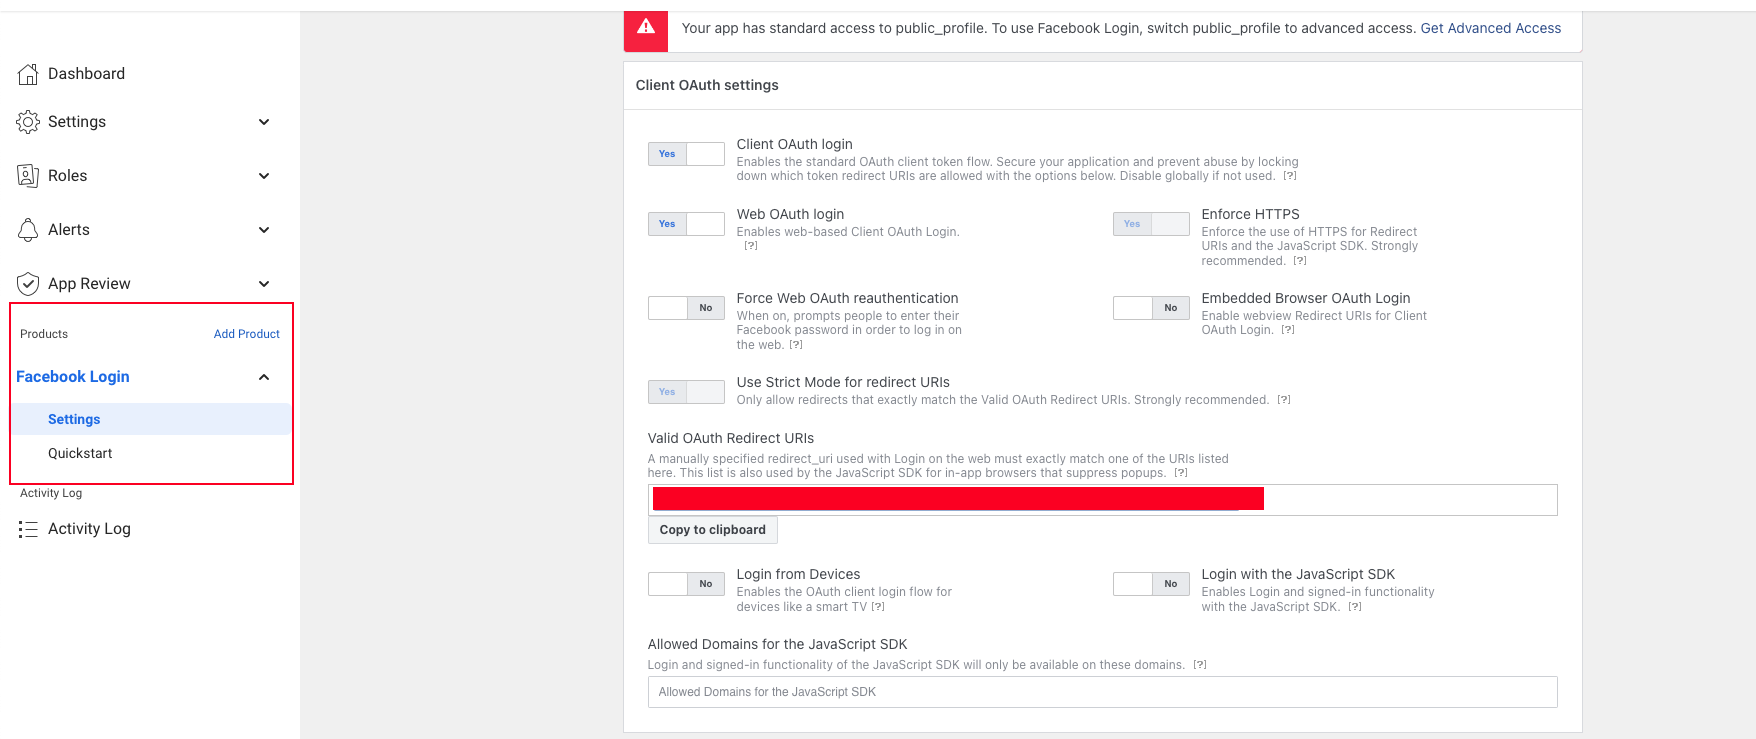
And finally we will configure a product, which we will use Facebook Login.
Provisioning Azure AD B2C
First thing that we have to do is to create a new resource.
Step 1: Creating an Azure Active Directory B2C Resource
In Azure Portal in the resource input, wi will type ‘Azure Active Directory B2C’ to look for the Azure AD B2C, we will see the next section.
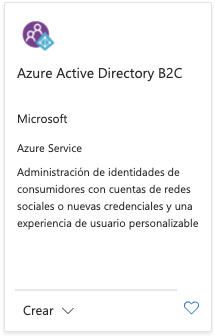
We will hit the create button and we will see the next page:

And we will choose Create a new tenant. Once we choose the new tenant option we will see the next page:
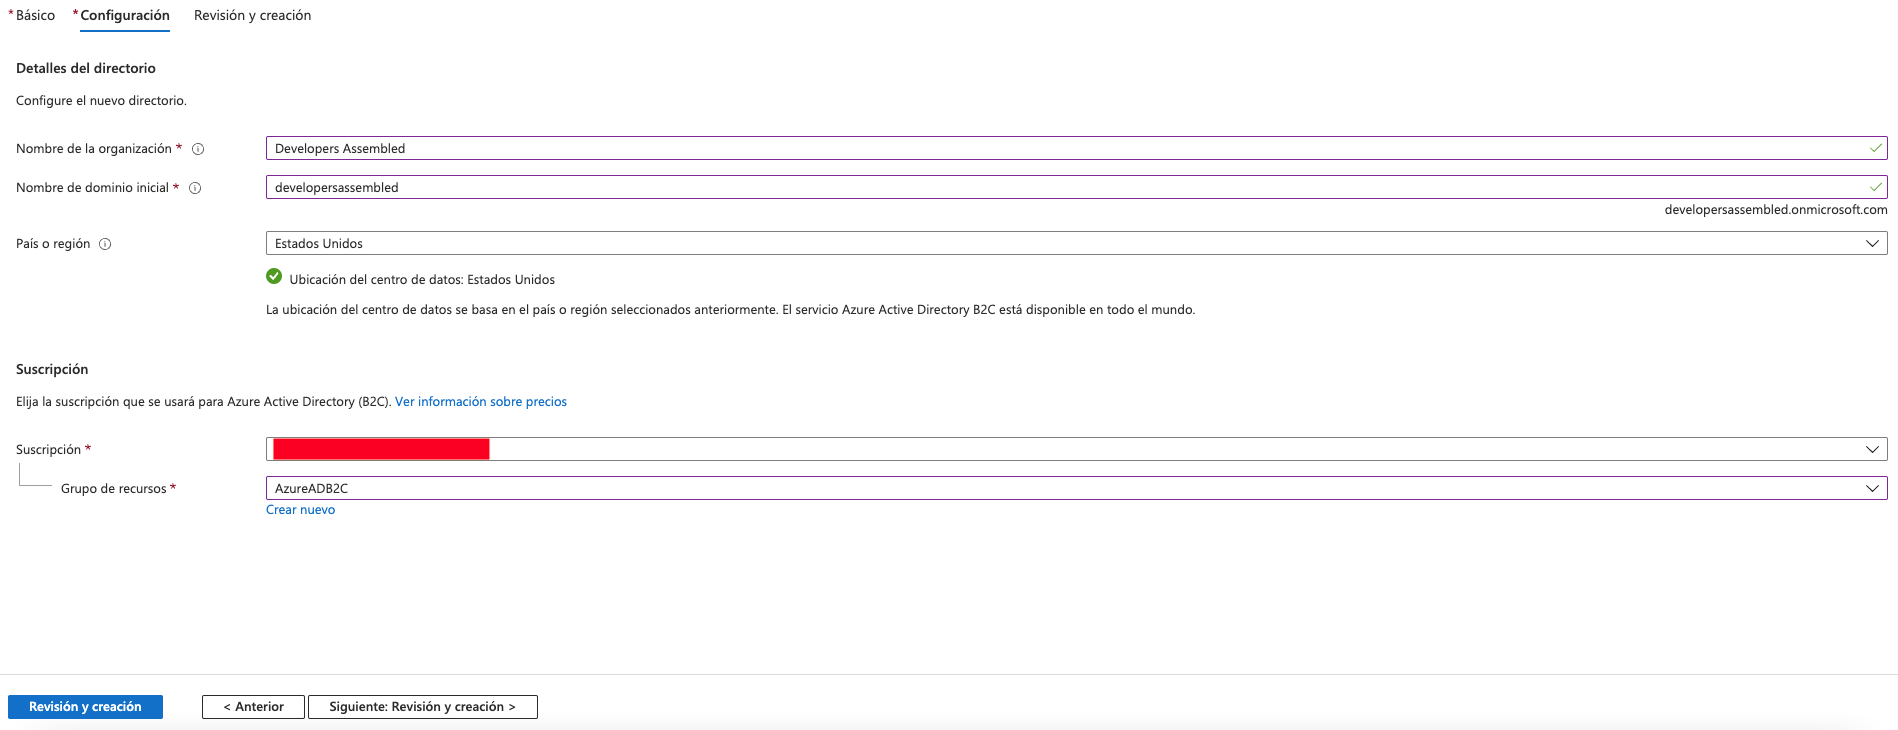
In this section we will fill the fields:
- Name of the organization
- Name of the domain
- Country of Data Center (by default is selected EEUU)
- Select our Azure Suscription
- Select or create our resource group.
For finish we will hit Review and Create Button.
Step 2: Creating Applications
As we will use Facebook to Log In, we need to create two applications with the following names:
- IdentityExperienceFramework
- ProxyIdentityExperienceFramework
To create a new application we go to the next section:
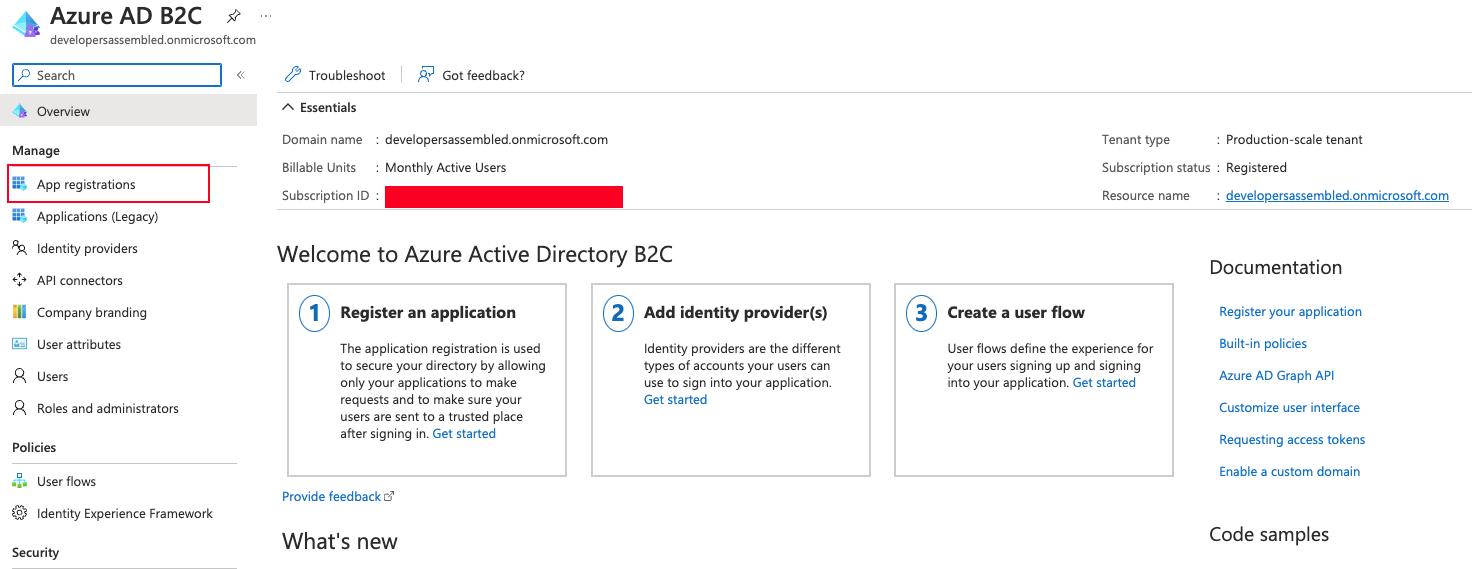
Creating Identity Experience Framework
To create a new application, click over App Registration, you will see next page:
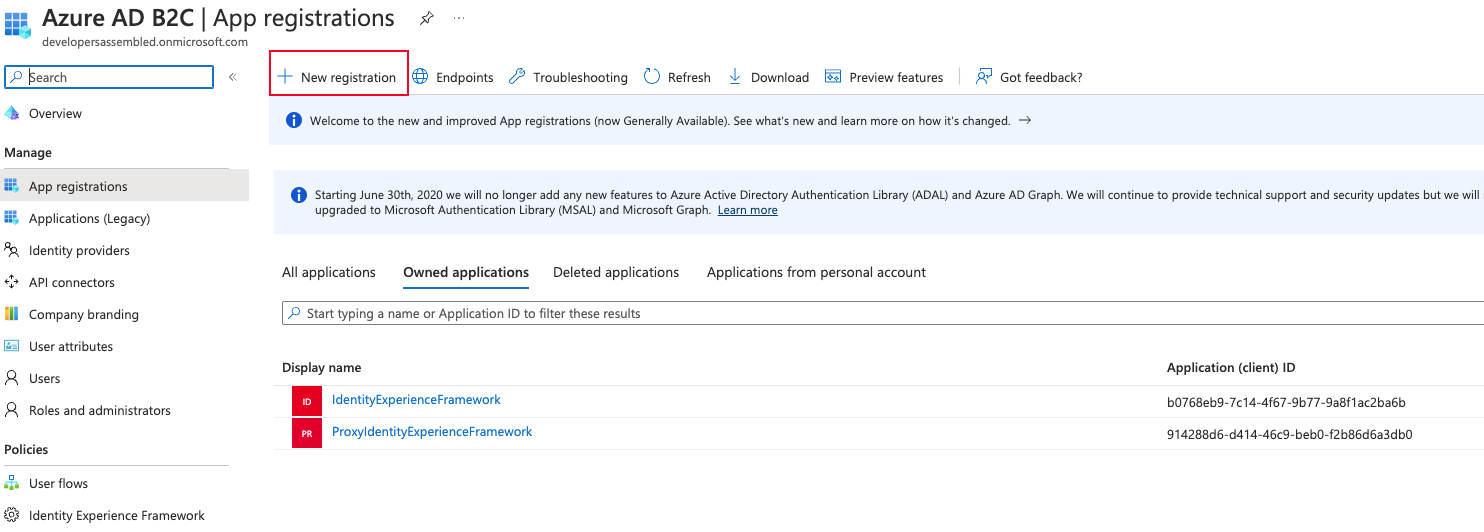
After we click over “New registration”, we will see this page:
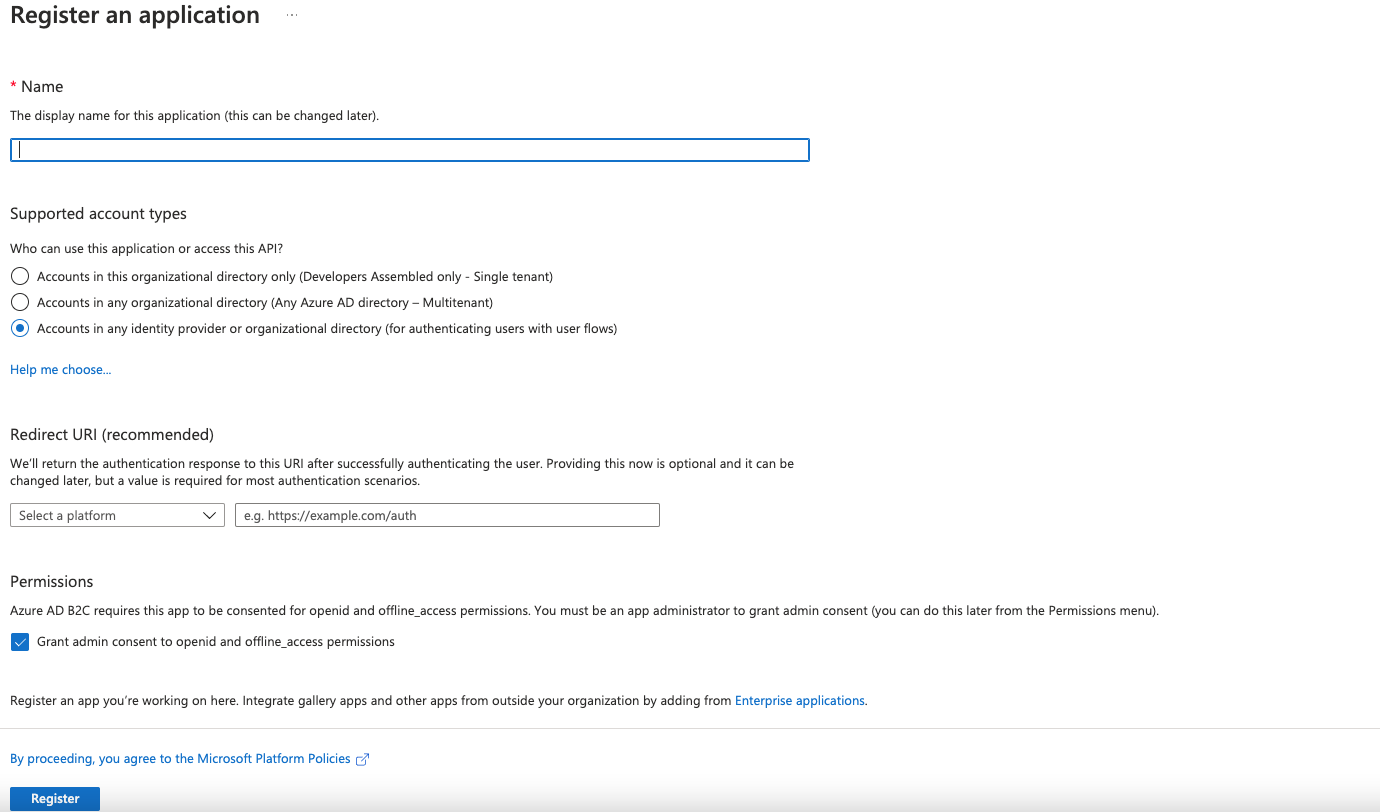
In the field name we will type Identity Experience Framework, then we choose “Accounts in any identity provider or organizational directory (for authenticating users with user flows)” and the permissions section we will select offiline_access and finally register.
After this process we will see the next page

Authentication
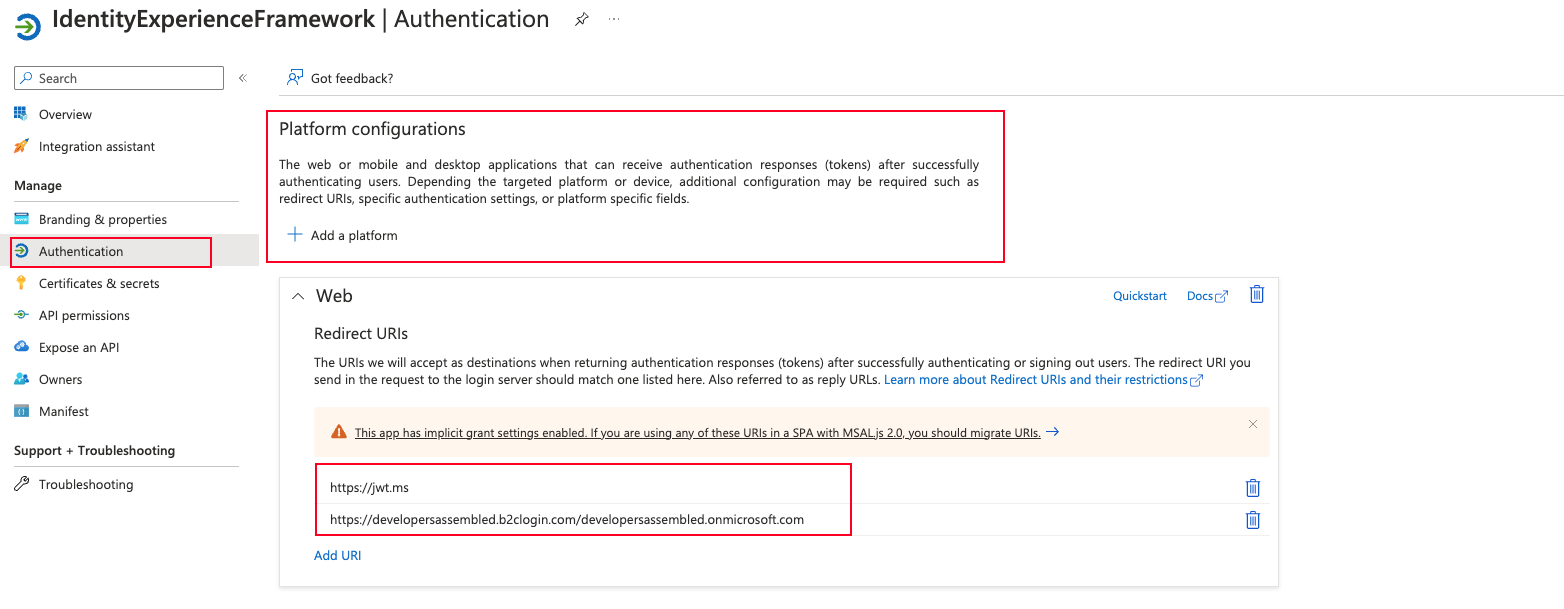
Here we will do a few things:
- Add a platform as Web
- Configure Redirect URIs, for this example we will add two:
- https://jwt.ms (this is a page which allow us to decode a JWT Token)
- https://{your-tenant-name}.b2clogin.com/{your-tenant-name}.onmicrosoft.com
Another configuration that we have to do is:
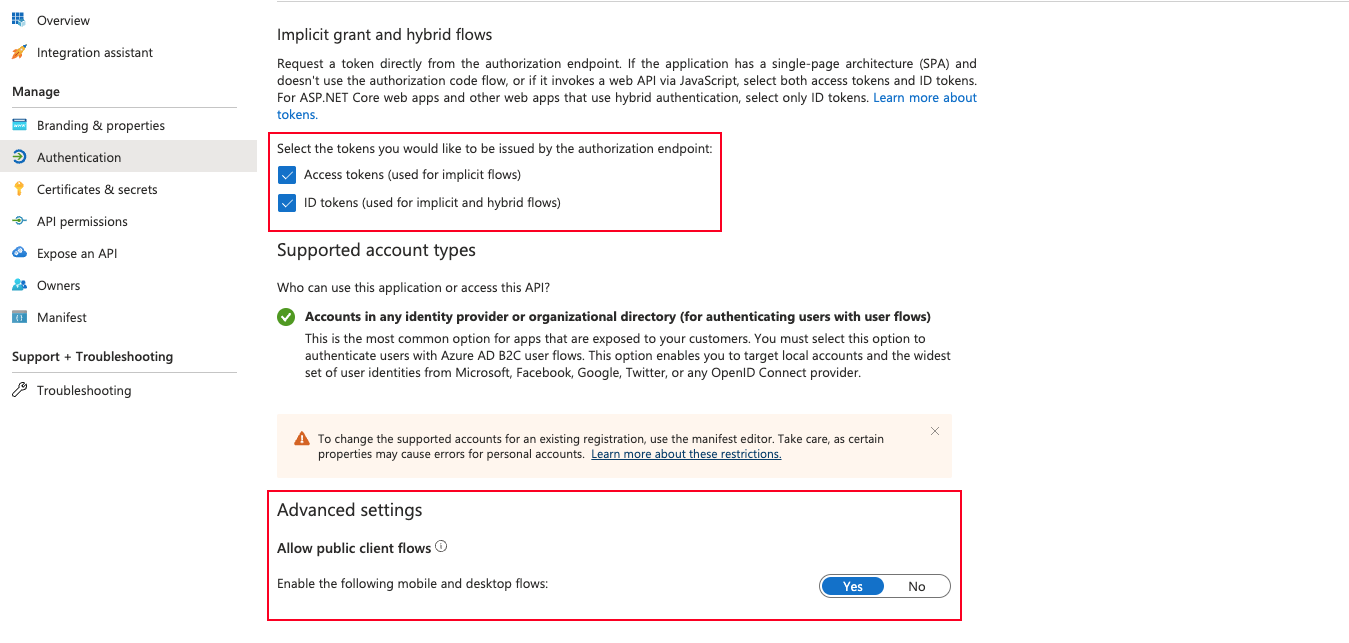
In the “Implicit grant and hybrid flows” we need to check both options:
- Access Tokens
- Id Tokens
In the “Advanced Settings” we need to set in yes the opcion “Enable the following mobile and desktop flows”
Expose an API

In this section we will configure scopes, according to auth0 a scope decide which information you would like applications to be able to access on a user’s behalf.
To add a scope we have to hit the Add a scope button, and this will show us a side page to enter the required information:
- Scope name
- Admin consent display name
- Admin consent description
- State
Following the example provided by Microsoft Learn, we set up the following configuration:
- Scope name: user_impersonation
- Admin consent display name: Access IdentityExperienceFramework
- Admin consent description: Allow the application to access IdentityExperienceFramework on behalf of the signed-in user.
- State: true
With this we have already finished the configuration of Identity Experience Framework.
Creating Proxy Identity Experience Framework
We will skip the process to create the application, because it is the same process that we did in last part (Creating Identity Experience Framework), but we will do some changes below:

We will choose:
- Public client/native
- Redirect URI: myapp://auth
API Permissions
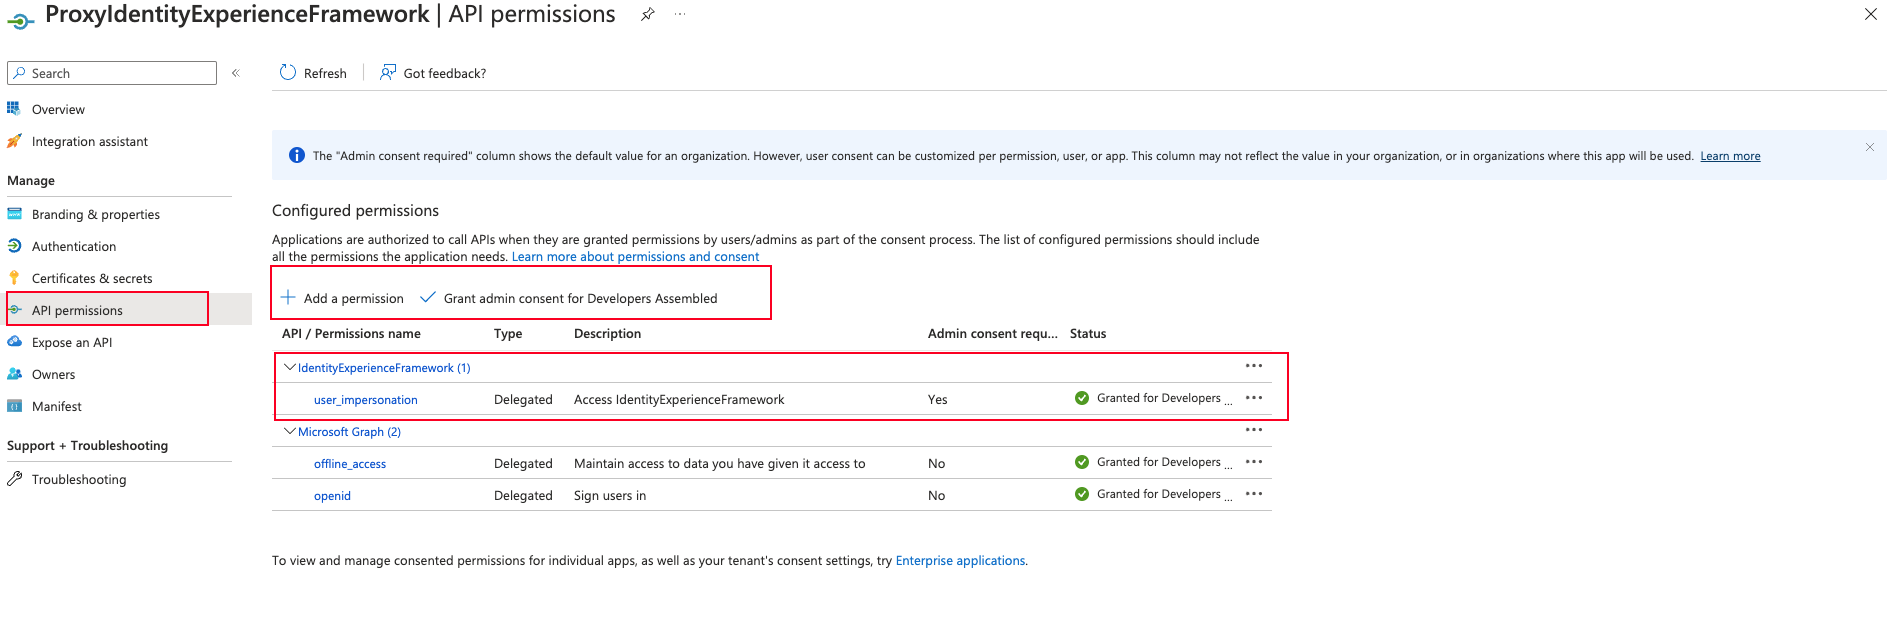
In this page we will add permission for the app that we have created (Proxy Identity Experience Framework).
To add a permission, we hint the Add a permission button, and we will see the following page:
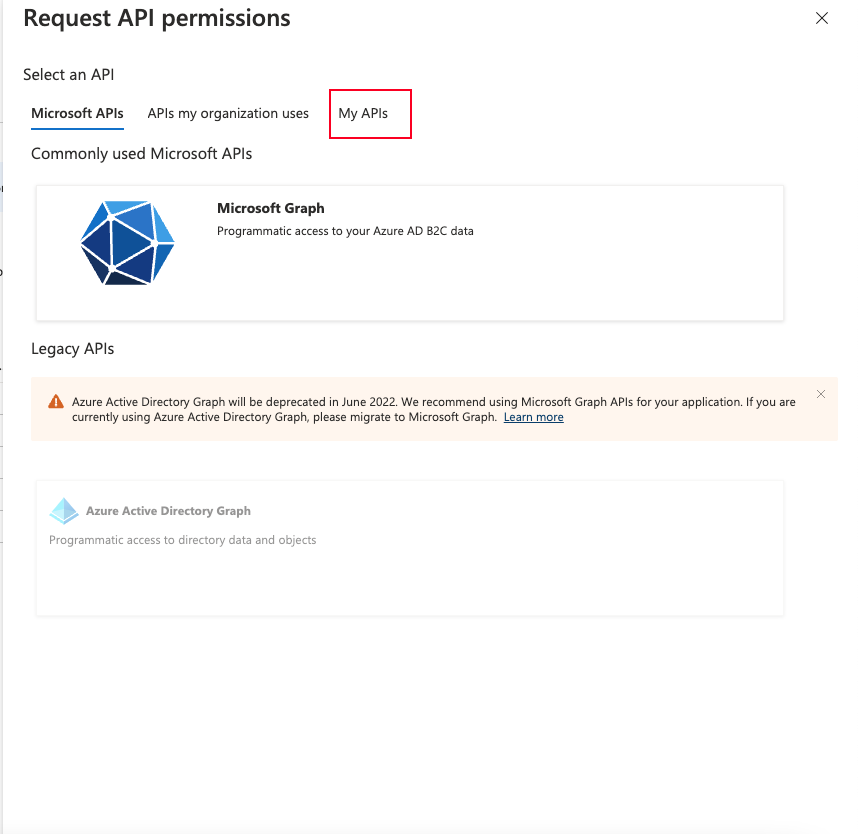
In this page we will select “My APIs” and we will see this page:
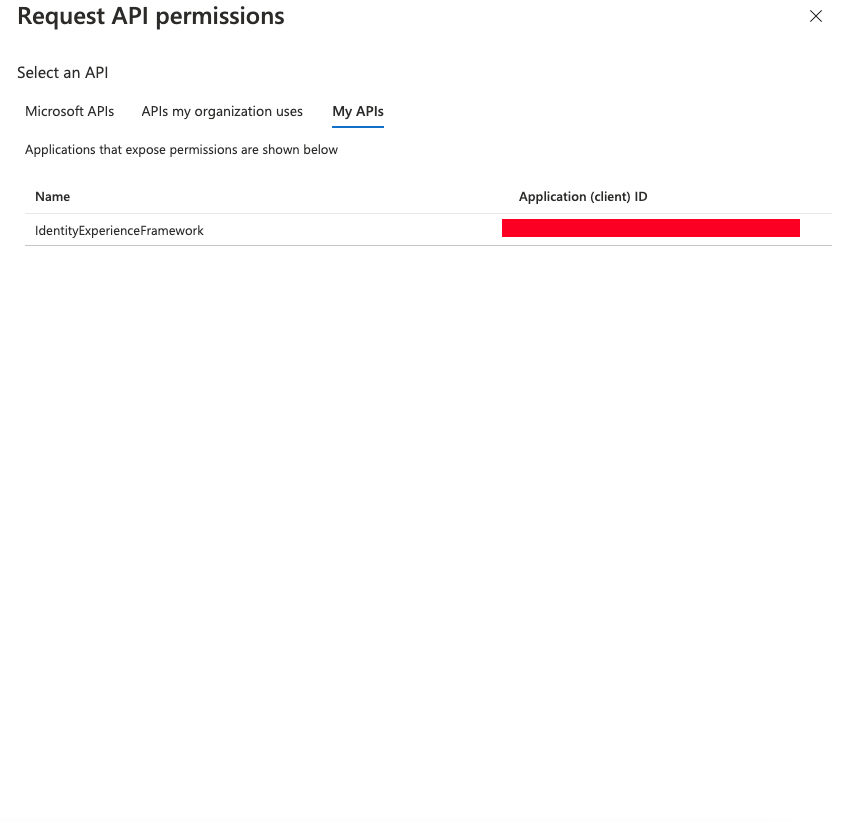
We will select “IdentityExperienceFramework” which it is the previous application created.
Once we have selected we will see the next page:
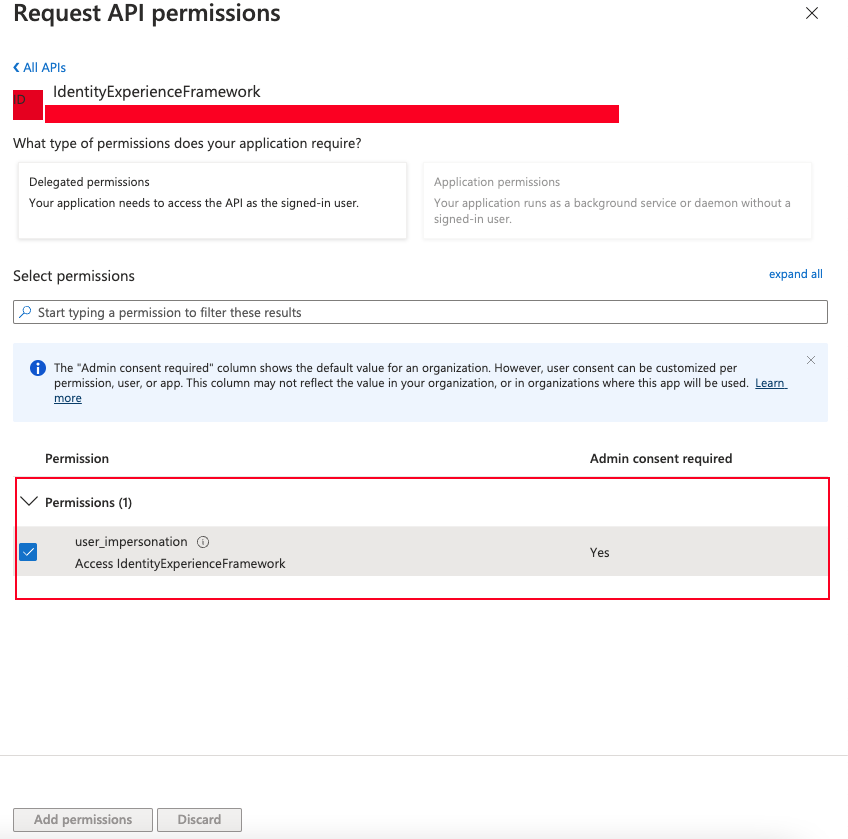
In this part we will select “user_impersonation”, which its the scope that we created in Indetity Framework Experience application, and then we hit “Add permissions” button.
And with this we have already finished the configuration for Proxy Identity Framework Experience.
Step 3: Policies
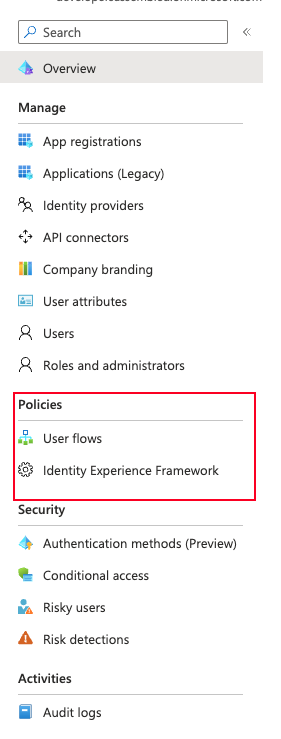
In this section we will add custom policies for the identity provider (Facebook).
We will configure some XMLs and upload to Azure, to specify the configuration of the application that we have created in Facebook. With this Azure will know to request permission to the user for reading some information from Facebook and get the access tokens to use for authorization.
Creating the signing key and encription key
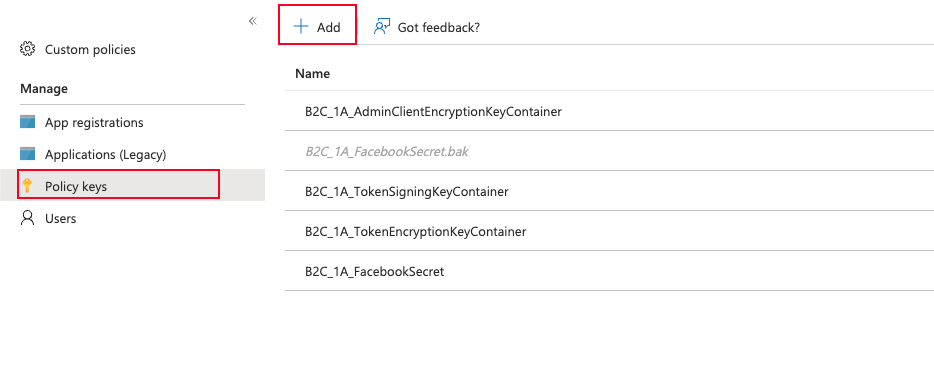
For creating both keys we will hit the “Add” button, and we will see the next page:

For signing key we will type and choose the next options:
- Name: TokenSigningKeyContainer
- Key type: RSA
- Key usage: Signature
For encription key we will type and choose the next options:
- Name: TokenEncryptionKeyContainer
- Key type: RSA
- Key usage: Encryption
For both key in the option section we will choose “Generate”.
And finally “Create”.
Creating the key for Facebook Secret
When we were creating the Facebook application, Facebook provided us an application secret, this secret is required to connect with that application from Azure, for that reason we need to add it as a secret inside it.
We will follow the same steps of the previos section (Creating the signing key and encription key), with the follow difference:
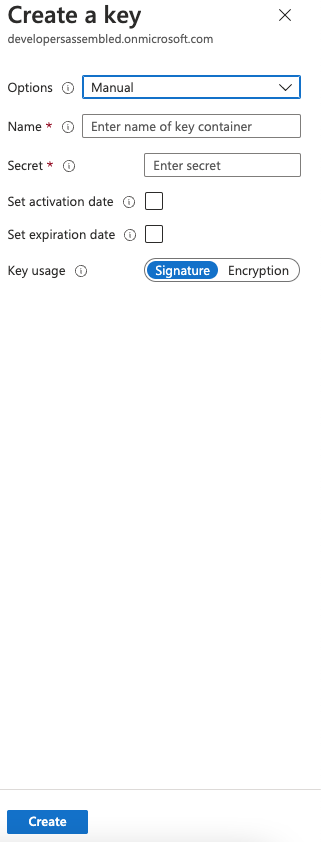
- Options: Manual
- Name: FacebookSecret
- Secret: we paste the secret got from Facebook
- Key usage: Signature
And finally “Create”
XML Custom Policy Configuration
For this section Microsoft provide the following examples in the following repository: Custom Policy Starter Pack.
For this section we will use the XMLs of the SocialAndLocalAccounts folder.
As Microsoft Learn explain we have to configure out Facebook application Id in the next XML: TrustFrameworkExtensions.xml
<TechnicalProfile Id="Facebook-OAUTH">
  <Metadata>
  <!--Replace the value of client_id in this technical profile with the Facebook app ID"-->
    <Item Key="client_id">00000000000000</Item>
In addition to this configuration we need to do the next configuration:
<?xml version="1.0" encoding="utf-8" ?>
<TrustFrameworkPolicy
  xmlns:xsi="http://www.w3.org/2001/XMLSchema-instance"
  xmlns:xsd="http://www.w3.org/2001/XMLSchema"
  xmlns="http://schemas.microsoft.com/online/cpim/schemas/2013/06"
  PolicySchemaVersion="0.3.0.0"
  TenantId="yourtenant.onmicrosoft.com"
  PolicyId="B2C_1A_TrustFrameworkExtensions"
  PublicPolicyUri="http://yourtenant.onmicrosoft.com/B2C_1A_TrustFrameworkExtensions">
Replace “yourtenant” by your tenant name, we need to do for the next xmls:
- TrustFrameworkBase.xml
- TrustFrameworkLocalization.xml
- TrustFrameworkExtensions.xml
- SignUpOrSignin.xml
- ProfileEdit.xml
- PasswordReset.xml
Once we have configured this XMLs, we need to upload them to Azure in the following order:
- TrustFrameworkBase.xml
- TrustFrameworkLocalization.xml
- TrustFrameworkExtensions.xml
- SignUpOrSignin.xml
- ProfileEdit.xml
- PasswordReset.xml
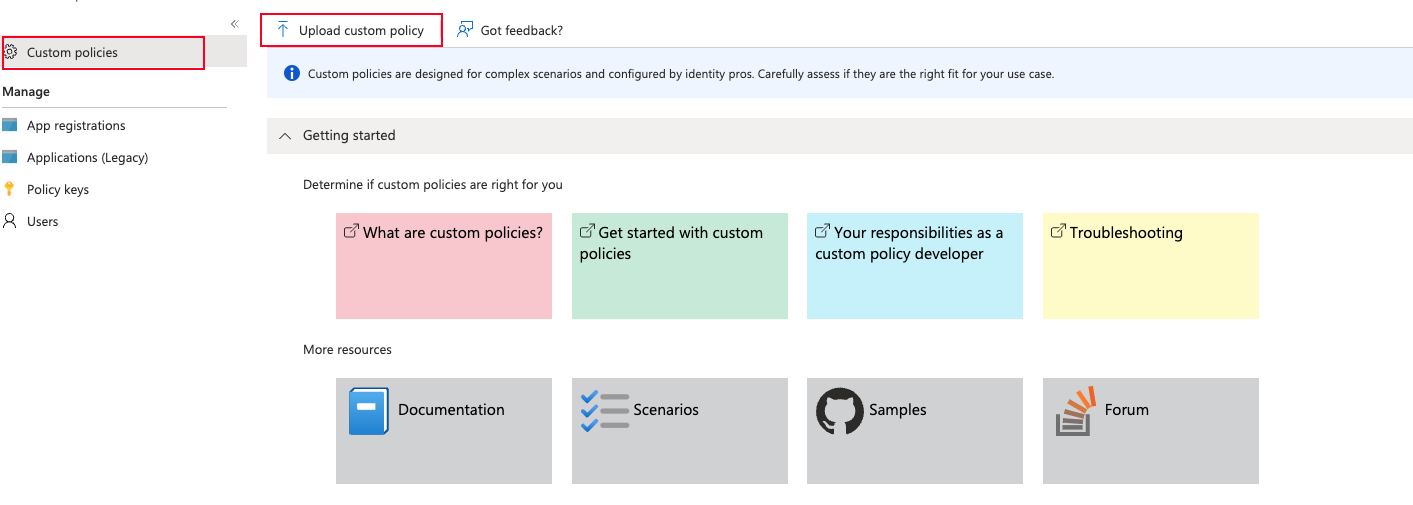
Step 4: Testing

For testing our configuration we will choose the next configuration: B2C_1A_SIGNUPORSIGNIN, and we will see the page:
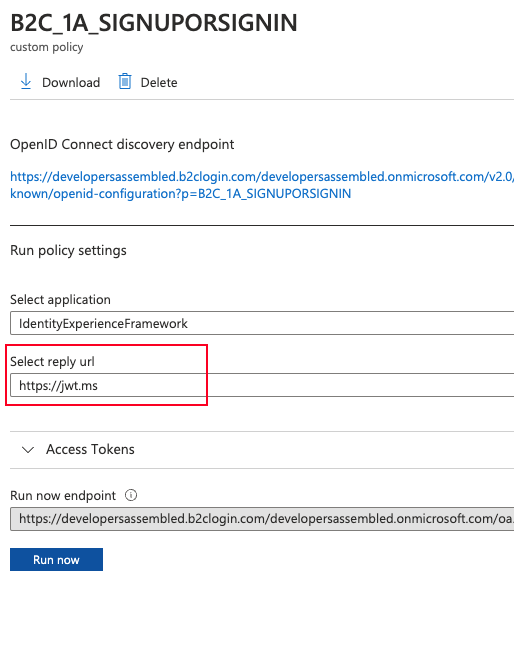
In this page we need select the https://jwt.ms url for Select reply url.
We will hit on Run now button.
Once we run the example we will see the next page:

As you see there is an option to Sign in/Login in with Facebook, if we click on Facebook button, Facebook will ask us if we grant permission to this app to access some information like name and email for example.
Finally we granted that permissions we will see the following page with the token information:

Well, with this we have finished this first part, a little bit large 😅.
I hope that it could be helpfull, Happy coding!!! 🧑🏻💻 😁